Improved structure terrain interactions (#4584 on Github)
Combined with the knowledge of Balthazar we managed to significantly reduce a common source of confusion and disappointment: bad terrain deformations. As you build structures the terrain was flattened underneath, with a bit of (bad) luck this could create sharp edges in the terrain that end up blocking pathing or projectiles all together.
As a few examples:
Seton's Clutch

Long John Silver
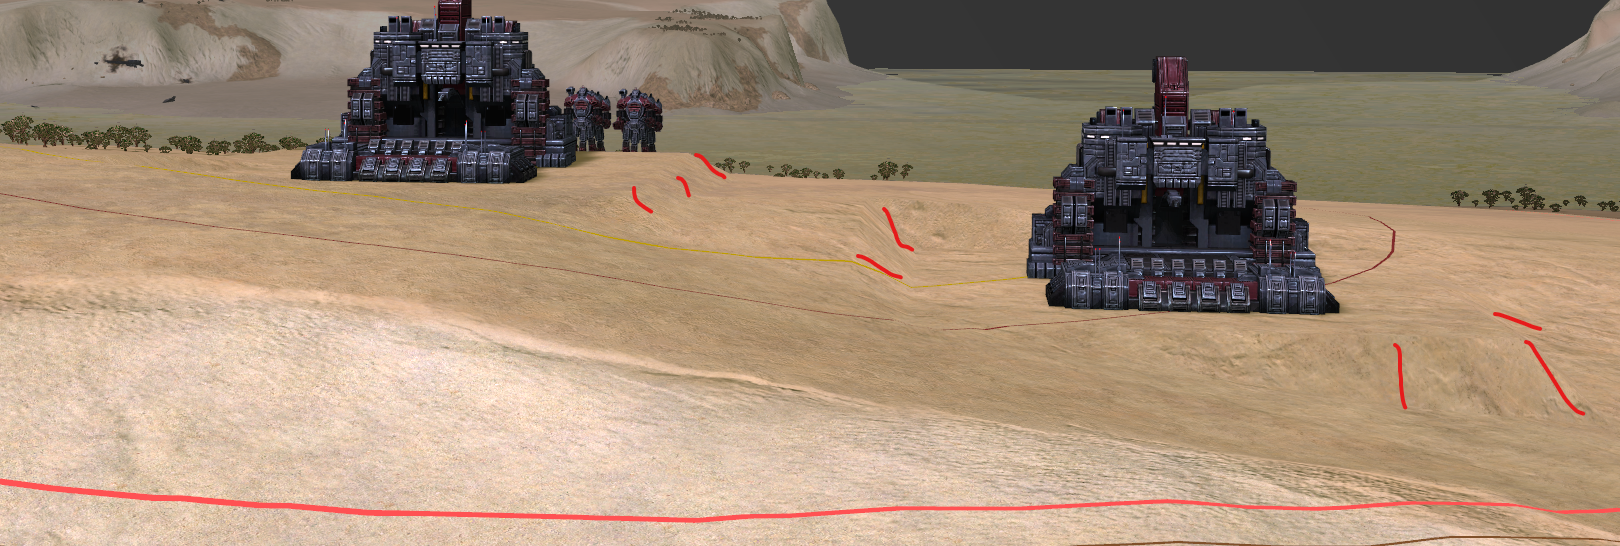
We're all too familiar with them, to the degree that it would even limit the creativity of map authors. Terrain has to be flat, or it will cause bad deformations that result in significantly worse gameplay.
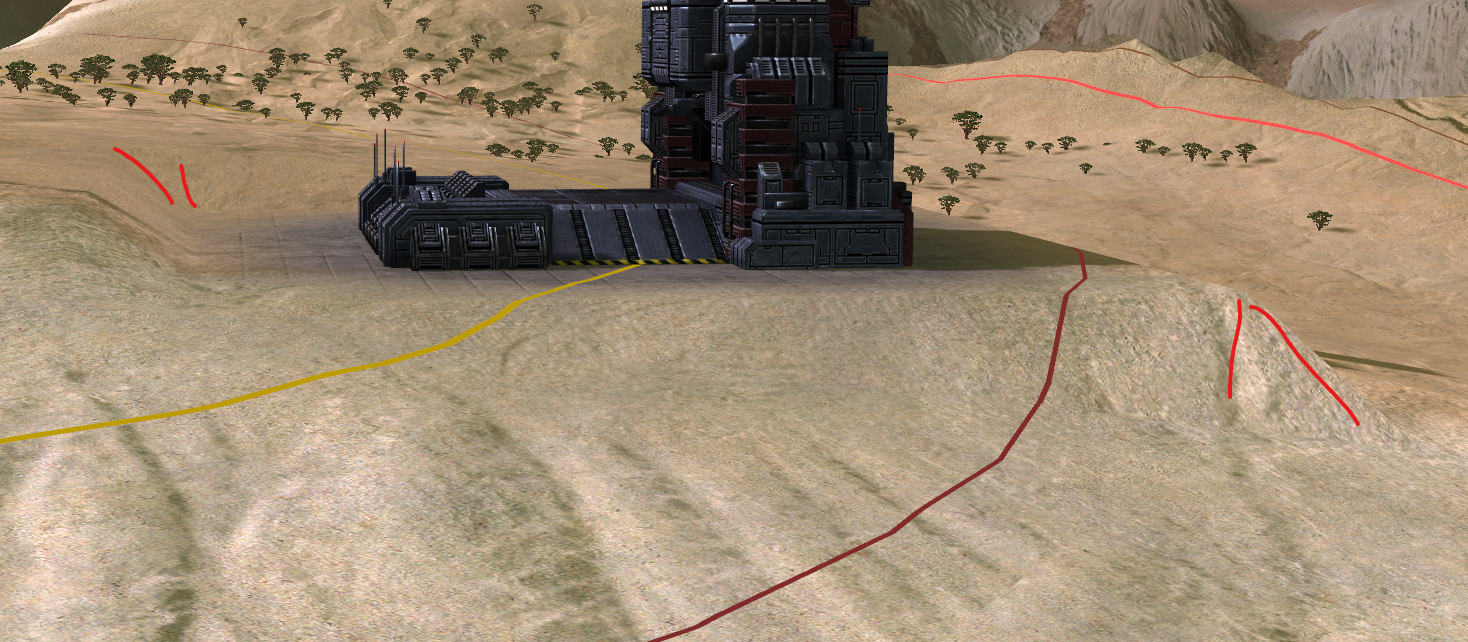
But - no more! With the changes we're making to how structures interact with terrain we no longer create a flat plane that needs to be completely horizontal. Instead, we create a gradient between the four points of the build skirt and slightly orient the structure to match the gradient as required. As a result the number of bad deformations is reduced significantly, to the degree that it is really difficult to create a bad deformation.
As a few examples:
Seton's clutch
Long John Silver
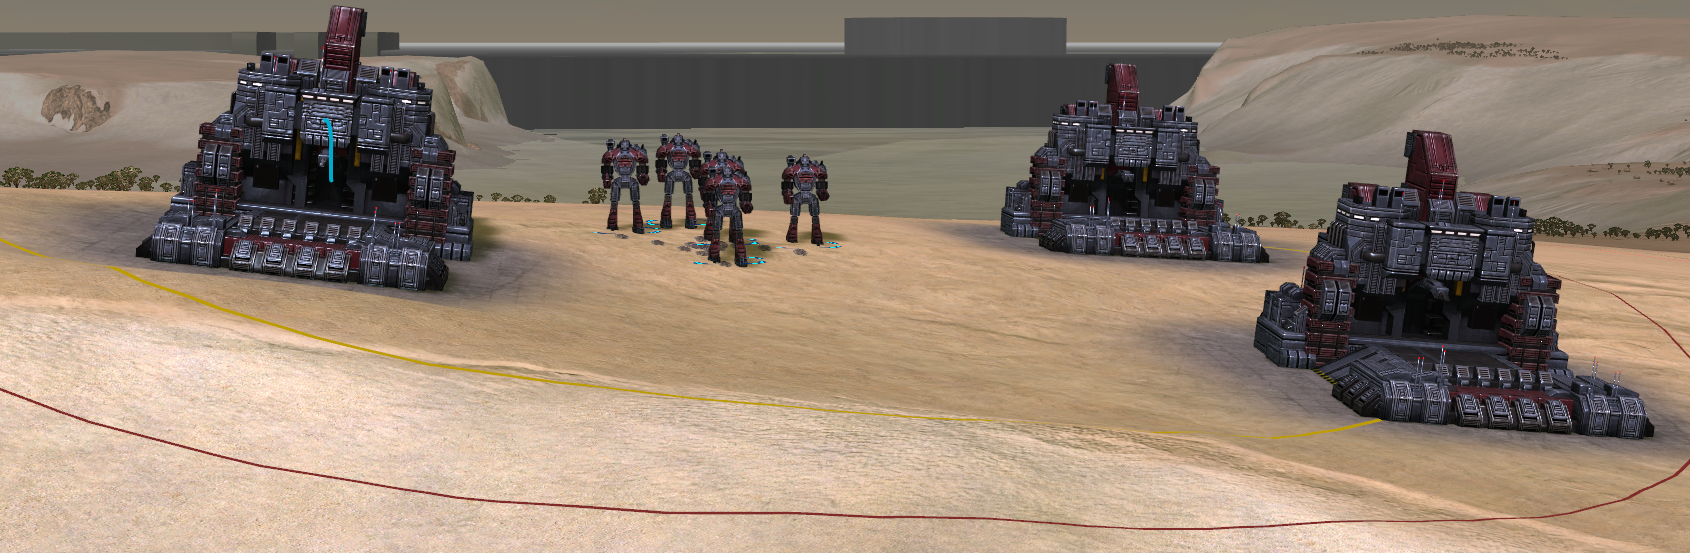
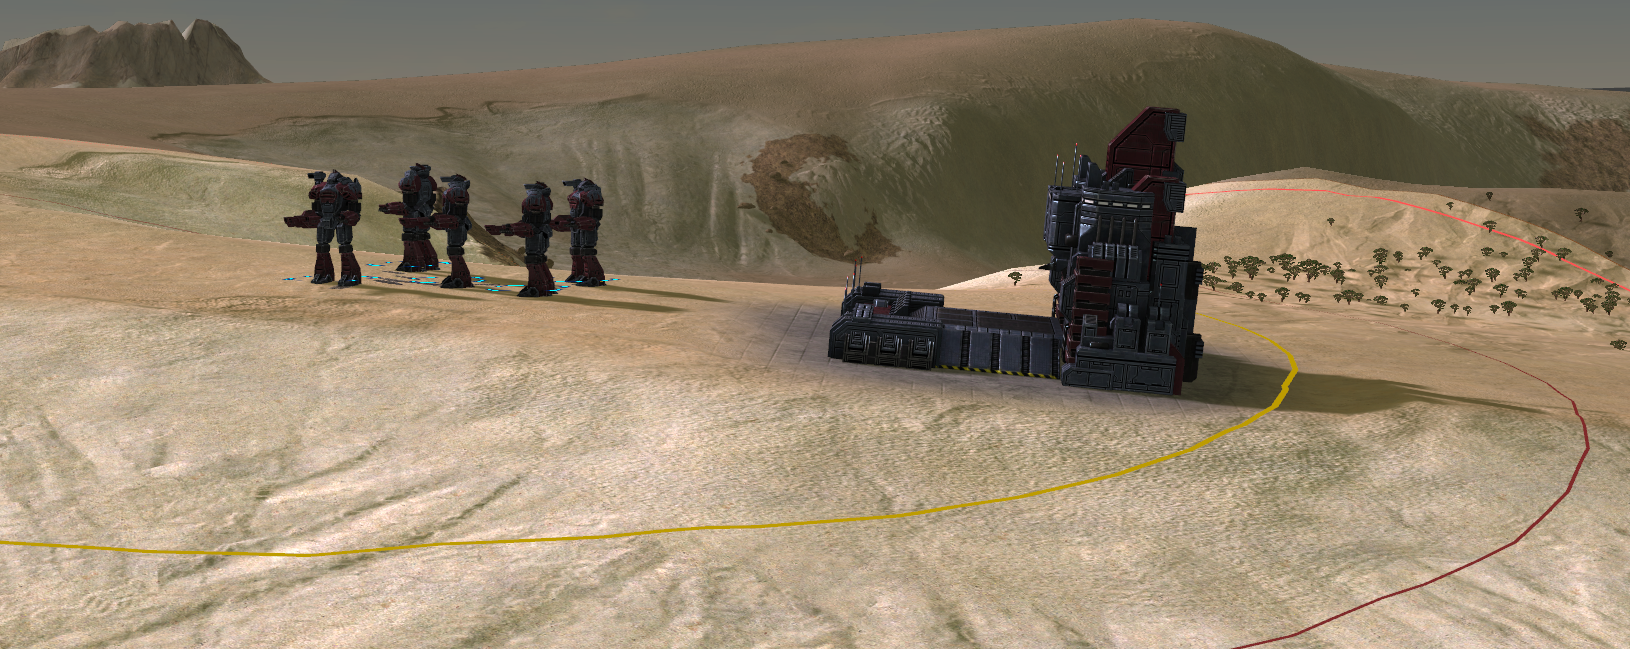
This change is significant - not only does it help you as a player to just enjoy the game. It will also increase the creative possibilities for map authors as terrain no longer necessarily needs to be flat.
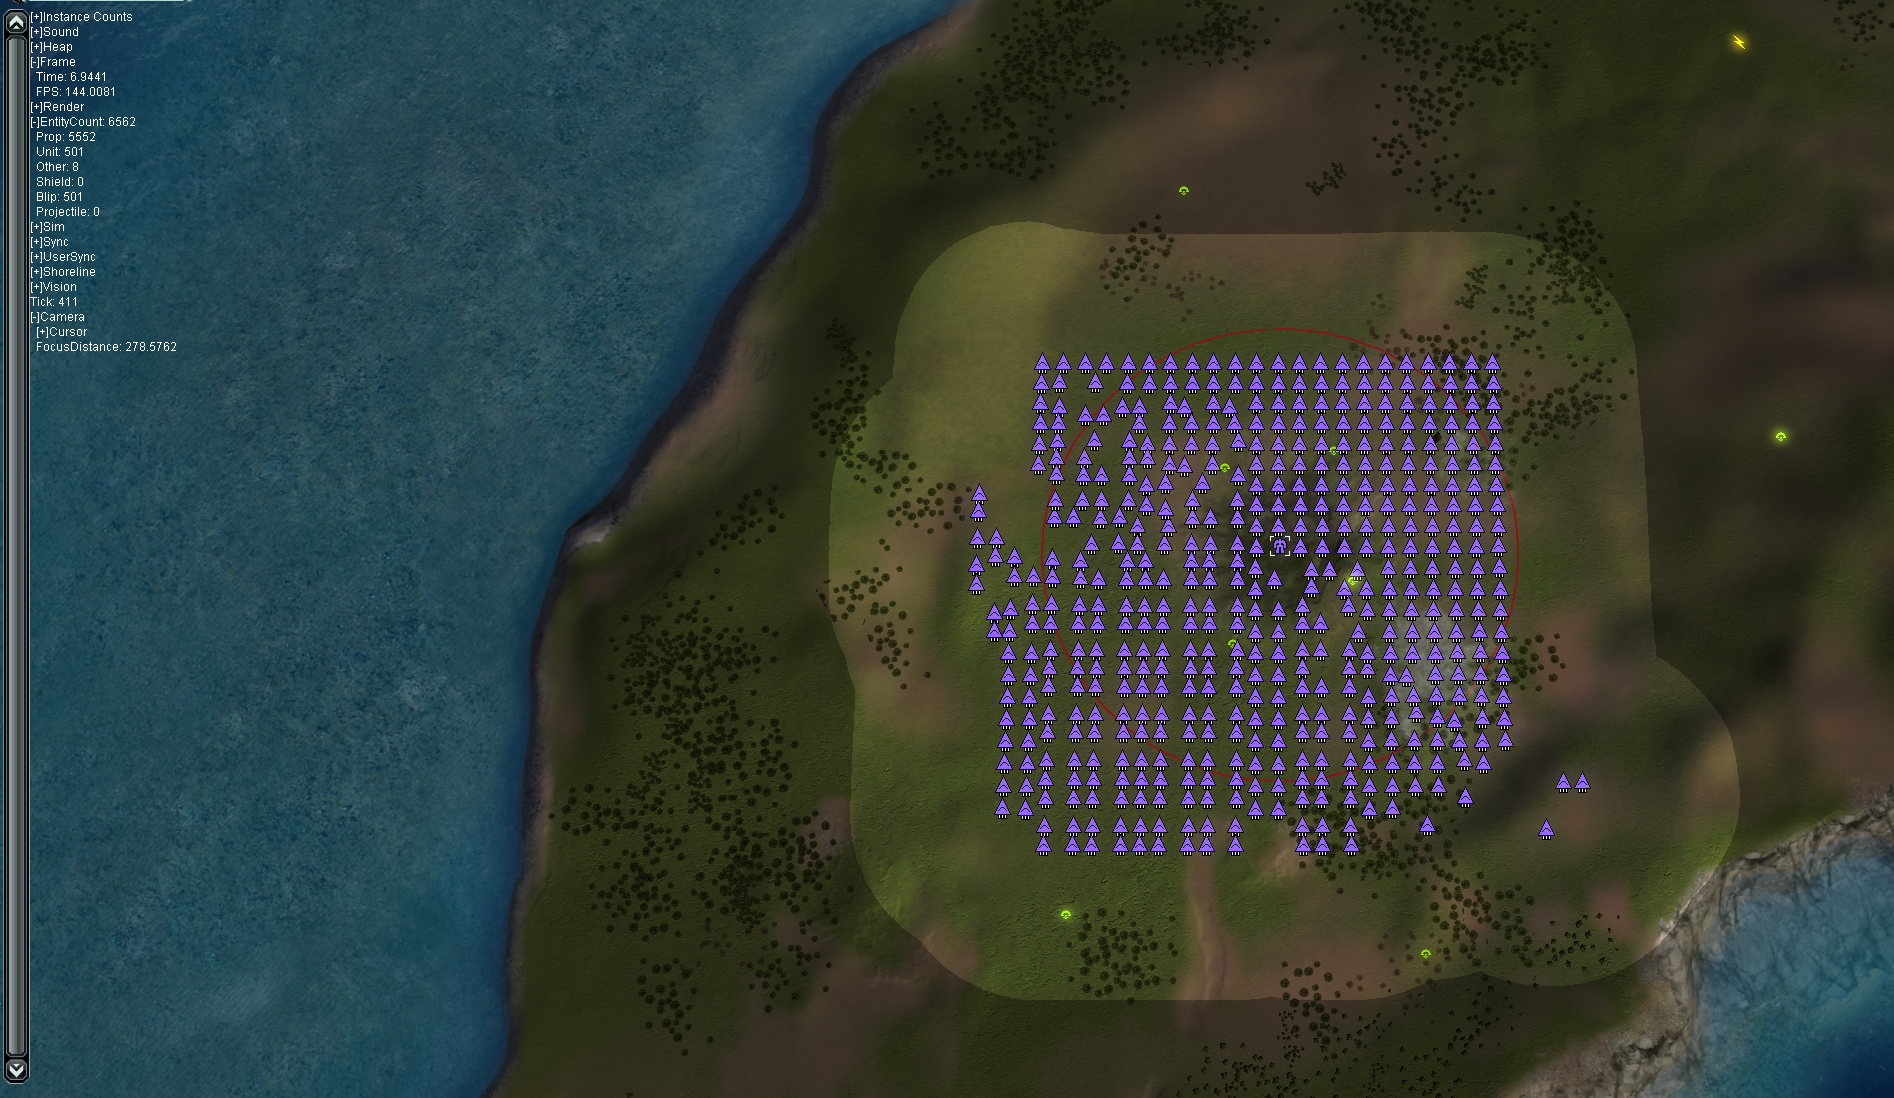
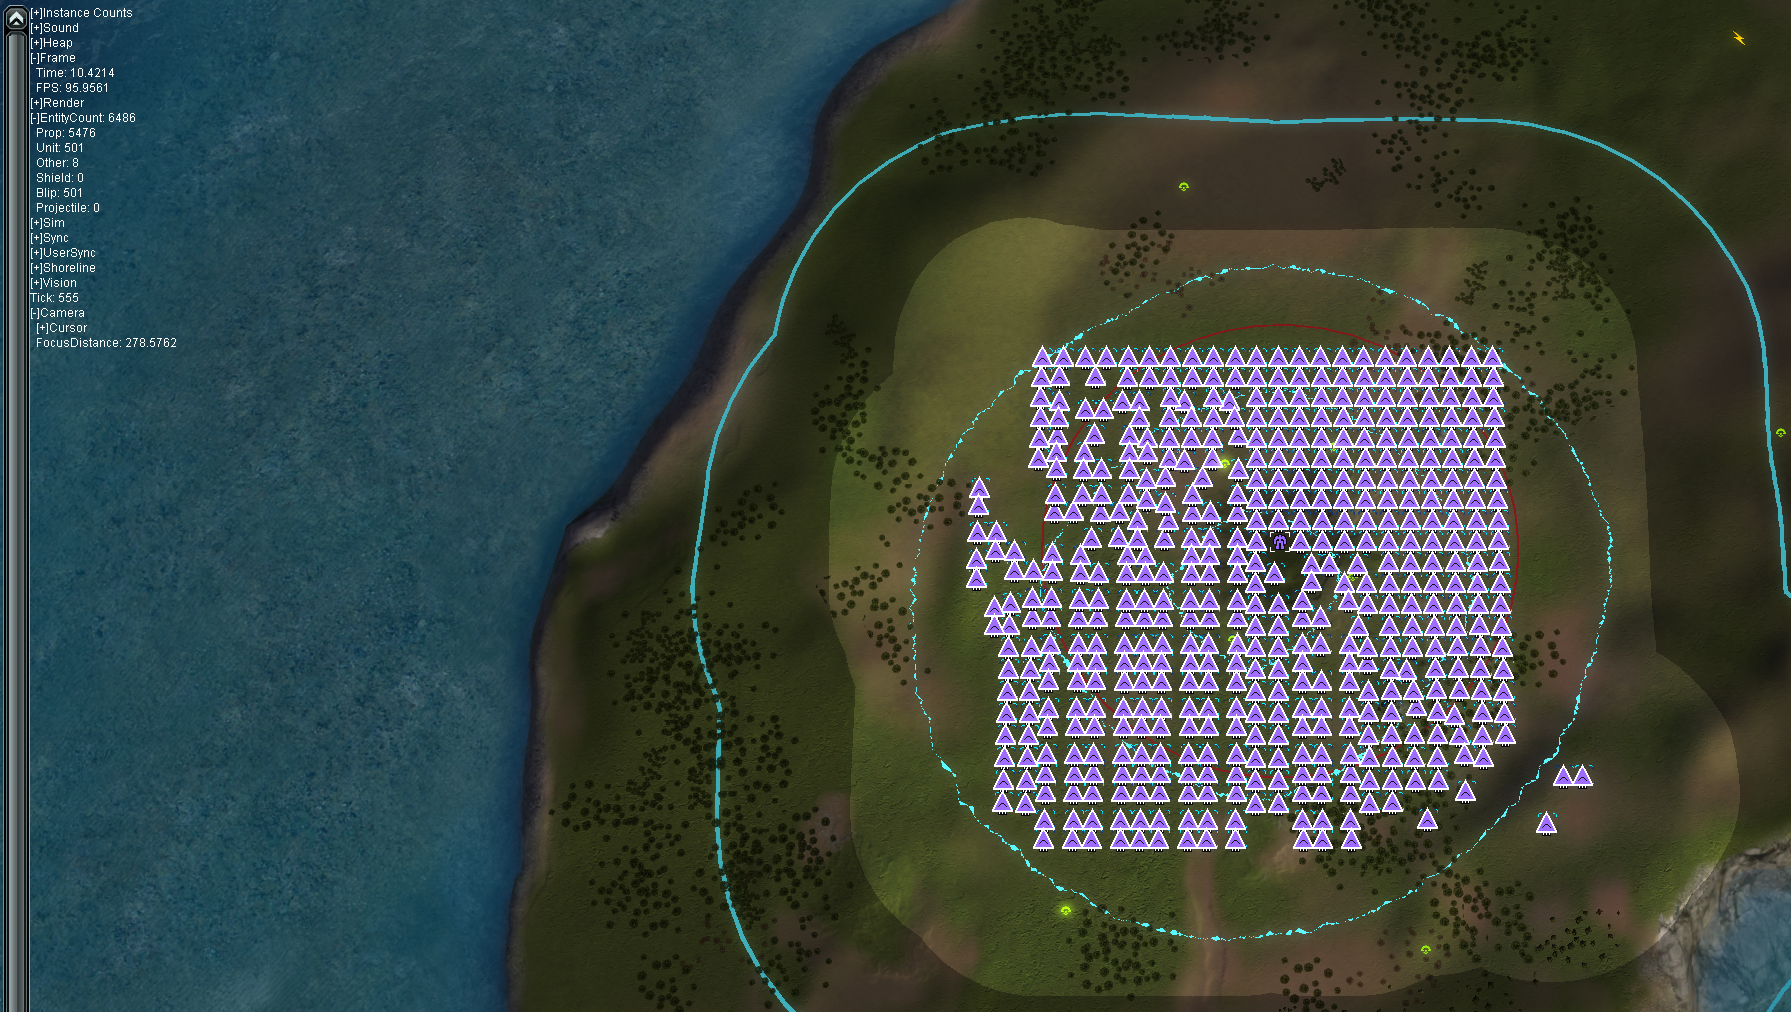
Significant performance improvements (#4584 on Github)
We've found one more large performance hiccup and managed to resolve it. The problem and solution is rather technical. Tthroughout the entire game you can expect 10% to 30% more performance on average, depending on what is happening.
I'll try and explain it - I've not found a way to keep it simple. Therefore I'll just write it out and make comparisons where possible.
Table trashing
The first issue was during instantiation of a table with a C reference. Instantiation means the creation (allocation) of something. And the table can reference quite literally anything:
A damage instance: any damage in general, regardless whether it hits a unit or propA decal: tread marks or the small decals we generate when projectiles hit the groundAn effect: terrain effects, projectile trail effects, projectile impact effects, build effects - the list goes onA blip: the radar blips that are created for unitsA manipulator: these are applied to units for animations, and the sliding of barrels as they fireAn entity: units, weapons, projectiles, bare entities, props, beams, trails, ...- ..., the list goes on but we'll stick with these examples
When we create an instance they inherit functionality and data from a Class. This was done via a table called a ClassFactory, which was defined as:
ClassFactory = {
    __call = function(self, ...)
        -- create the new entity with us as its meta table
        local instance = {&1 &0}
        setmetatable(instance, self)

        -- call class initialisation functions, if they exist
        local initfn = self.__init
        if initfn then
            initfn(instance, unpack(arg))
        end
        local postinitfn = self.__post_init
        if postinitfn then
            postinitfn(instance, unpack(arg))
        end

        return instance
    end
}
The problem is at the very start:
__call = function(self, ...) <-- note the '...'
The argument ... is called a varargs, and the idea is that it allows a function to be more flexible: you can pass any amount of data to the function and the function can then iterate over that data, as the data is stored in a table. The table is created regardless of whether there is any data to pass along. And that is exactly what the issue was: every example we just described does not use this approach to pass data to the instance. Therefore every example described has an overhead of creating a 80 byte table, just to trash it out again!
And the overhead is significant: 80 bytes sounds like nothing. But let us take a single event as an example: when a weapon fires a projectile. At this event the game creates:
1x manipulator: A slider to mimic recoil6x effects: two effects for firing the weapon (a flash and smoke for example), two effects for the projectile itself and two impact effects1x projectile1x damage1x decal1x other things
In total, on average:
11x varargs table created just to trash it again
For this single event we've trashed up to 880 bytes worth of memory. The average unit fires about 1 projectile per second. That means during a battle a single unit can trash up to almost a kilobyte of memory per second! Multiply that by 200 units for the average battle and we're talking about hundreds of kilobytes of data being generated per second, just to trash it again. To put that into perspective:
- This post is about 5 kilobytes of text, at the moment of writing this sentence. We'd trash the same amount of memory when a Hoplite fires one salvo
- The average JPEG image is about 50 to 500 kilobytes. It is not unreasonable to trash as much memory as the average JPEG image per second during a relatively small battle
We can continue on - but the impact is quite significant when you take into account the garbage collector and how the CPU cache works. For example, we drastically reduce trashing the caches and increase the chance of a cache hit.
For those that like a puzzle: there are a lot of other very common events that no longer create this dummy table. Can you find some based on this information? I'll add them to a list in this post as they are found ")
Pre allocate tables
The second issue is about how tables grow in memory as more elements as attached to it. We'll take the example of the creation of a projectile again. When a projectile is created, we at least add the following fields to it:
OnCreate = function(self, inWater)
    -- store information to prevent engine calls
    self.Blueprint = EntityGetBlueprint(self)
    self.Army = EntityGetArmy(self)
    self.Launcher = ProjectileGetLauncher(self)
    self.Trash = TrashBag()
end,
Just like lists in C# do, a table in Lua starts with no allocated memory by default. As we add elements to the table (the self instance, in other words: the projectile) the table grows accordingly. This is done by logic similar to the following:
static void resize (lua_State *L, Table *t, int nasize, int nhsize) {
  int i;
  int oldasize = t->sizearray;
  int oldhsize = t->lsizenode;
  Node *nold;
  Node temp[1];
  if (oldhsize)
    nold = t->node;  /* save old hash ... */
  else {  /* old hash is `dummynode' */
    lua_assert(t->node == G(L)->dummynode);
    temp[0] = t->node[0];  /* copy it to `temp' */
    nold = temp;
    setnilvalue(gkey(G(L)->dummynode));  /* restate invariant */
    setnilvalue(gval(G(L)->dummynode));
    lua_assert(G(L)->dummynode->next == NULL);
  }
  if (nasize > oldasize)  /* array part must grow? */
    setarrayvector(L, t, nasize);
  /* create new hash part with appropriate size */
  setnodevector(L, t, nhsize);
  /* re-insert elements */
  if (nasize < oldasize) {  /* array part must shrink? */
    t->sizearray = nasize;
    /* re-insert elements from vanishing slice */
    for (i=nasize; i<oldasize; i++) {
      if (!ttisnil(&t->array[i]))
        setobjt2t(luaH_setnum(L, t, i+1), &t->array[i]);
    }
    /* shrink array */
    luaM_reallocvector(L, t->array, oldasize, nasize, TObject);
  }
  /* re-insert elements in hash part */
  for (i = twoto(oldhsize) - 1; i >= 0; i--) {
    Node *old = nold+i;
    if (!ttisnil(gval(old)))
      setobjt2t(luaH_set(L, t, gkey(old)), gval(old));
  }
  if (oldhsize)
    luaM_freearray(L, nold, twoto(oldhsize), Node);  /* free old array */
}
That is a lot of code, but more importantly: it allocates new memory, re-inserts the existing elements into the new memory and prepares the old memory for deallocation! That is a relatively expensive operation, but it all depends on how often it is run. To understand that, these are the resize thresholds for the hash-based array:
| Resize threshold |
Resizes to |
Bytes hash part occupies |
Total bytes |
| 0 or 1 |
2 |
40 |
80 |
| 2 |
4 |
80 |
120 |
| 4 |
8 |
160 |
200 |
| 8 |
16 |
320 |
360 |
| 16 |
32 |
640 |
680 |
| ... |
... |
... |
... |
| n |
2 * n |
n * 20 |
n * 20 + 40 |
That means when we create a projectile we have to resize at least three times! And in practice it is four times, where as the average projectile can take up to 8 hash entries. That causes it to just resize to 16. This is something we can try and optimize in the future too.
Usually in Lua you can not pre-allocate a table. That is not normal syntax. But the GPG devs introduced that syntax in the Moho engine. And using that syntax, we can size the table as it is created. As an example, this is a special class instantiation factory for projectiles:
ProjectileFactory = {
    ---@param self any
    ---@return table
    __call = function (self)
        -- LOG(string.format("%s -> %s", "ProjectileFactory", tostring(self.__name)))
        -- needs a hash part of one for the _c_object field
        local instance = {&15 &0}
        return setmetatable(instance, self)
    end
}
Where the important line is this:
local instance = {&15 &0}
Which states that we want to pre-allocate the hash part of the table so that it can at least hold up to 15 elements.
This same principle applies to any instance mentioned earlier, where we properly pre-allocate the table for units, shields, weapons, projectiles, damage instances, effects, decals and all the other parts of this game. We now properly pre-allocate them all, drastically reducing the frequency at which the engine ends up calling the resize function.
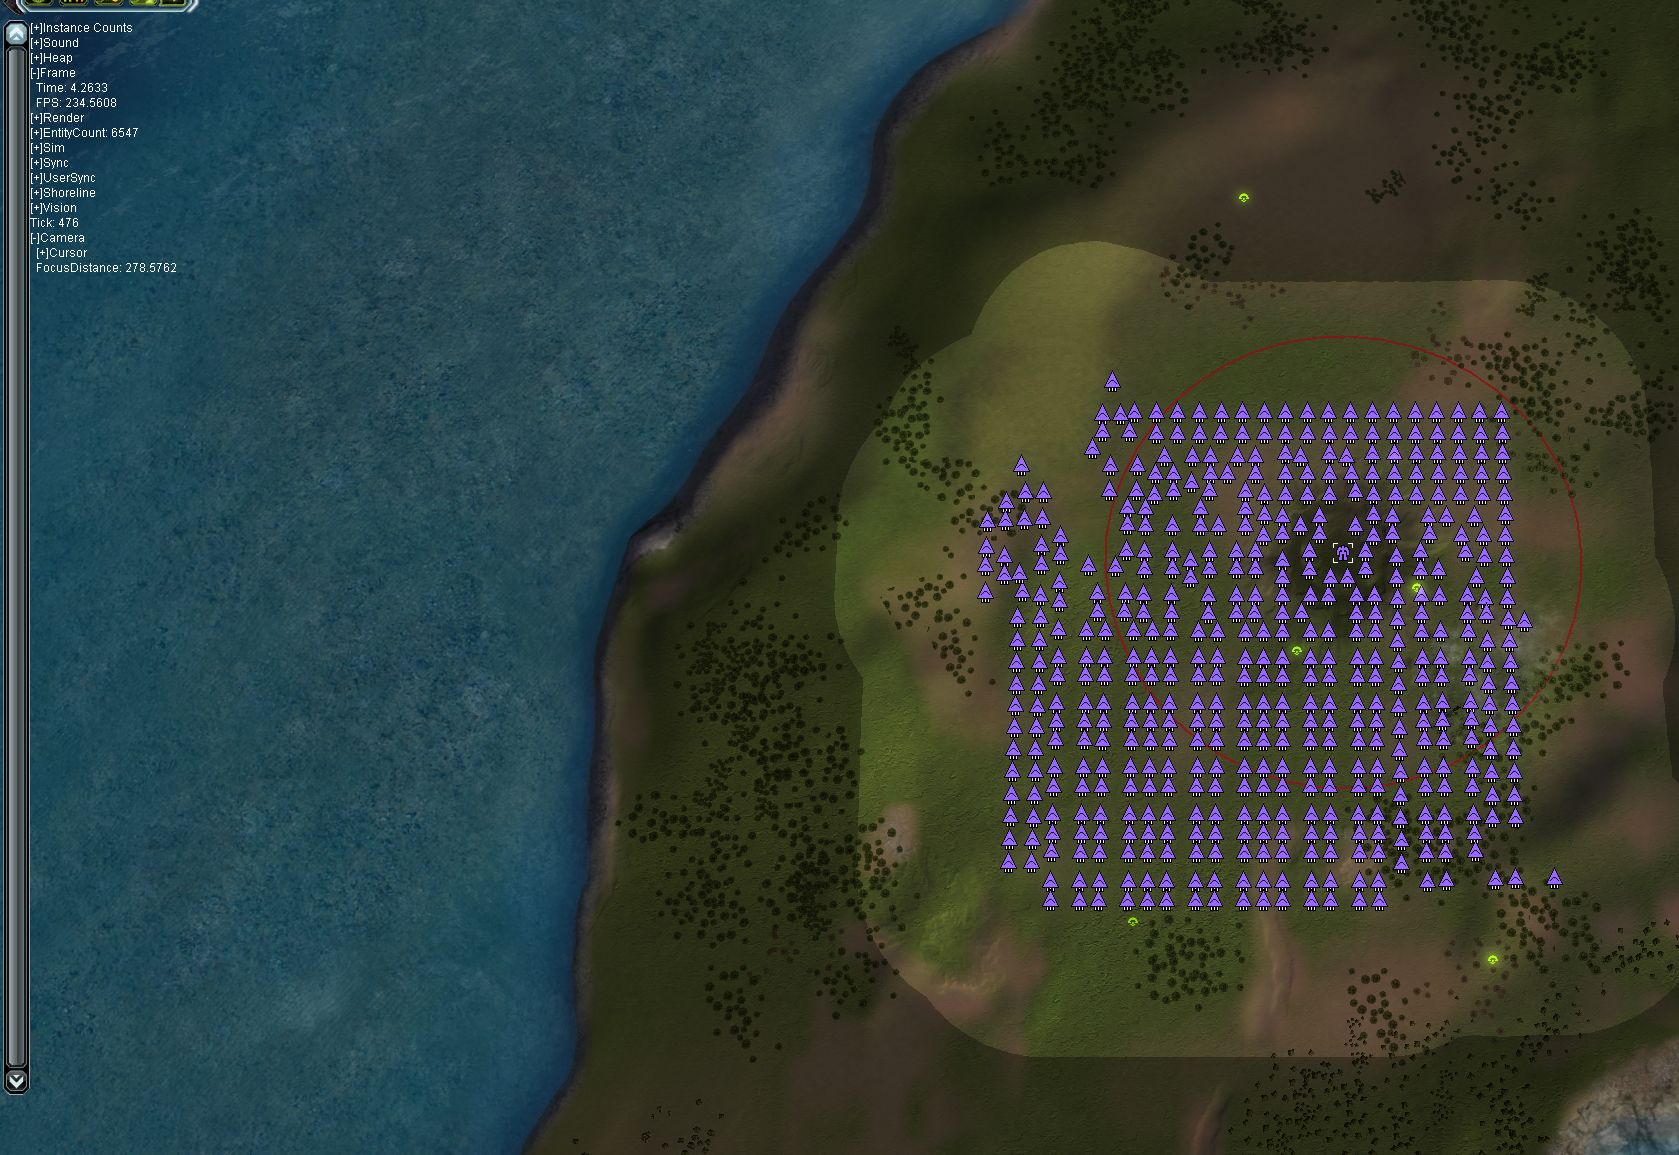
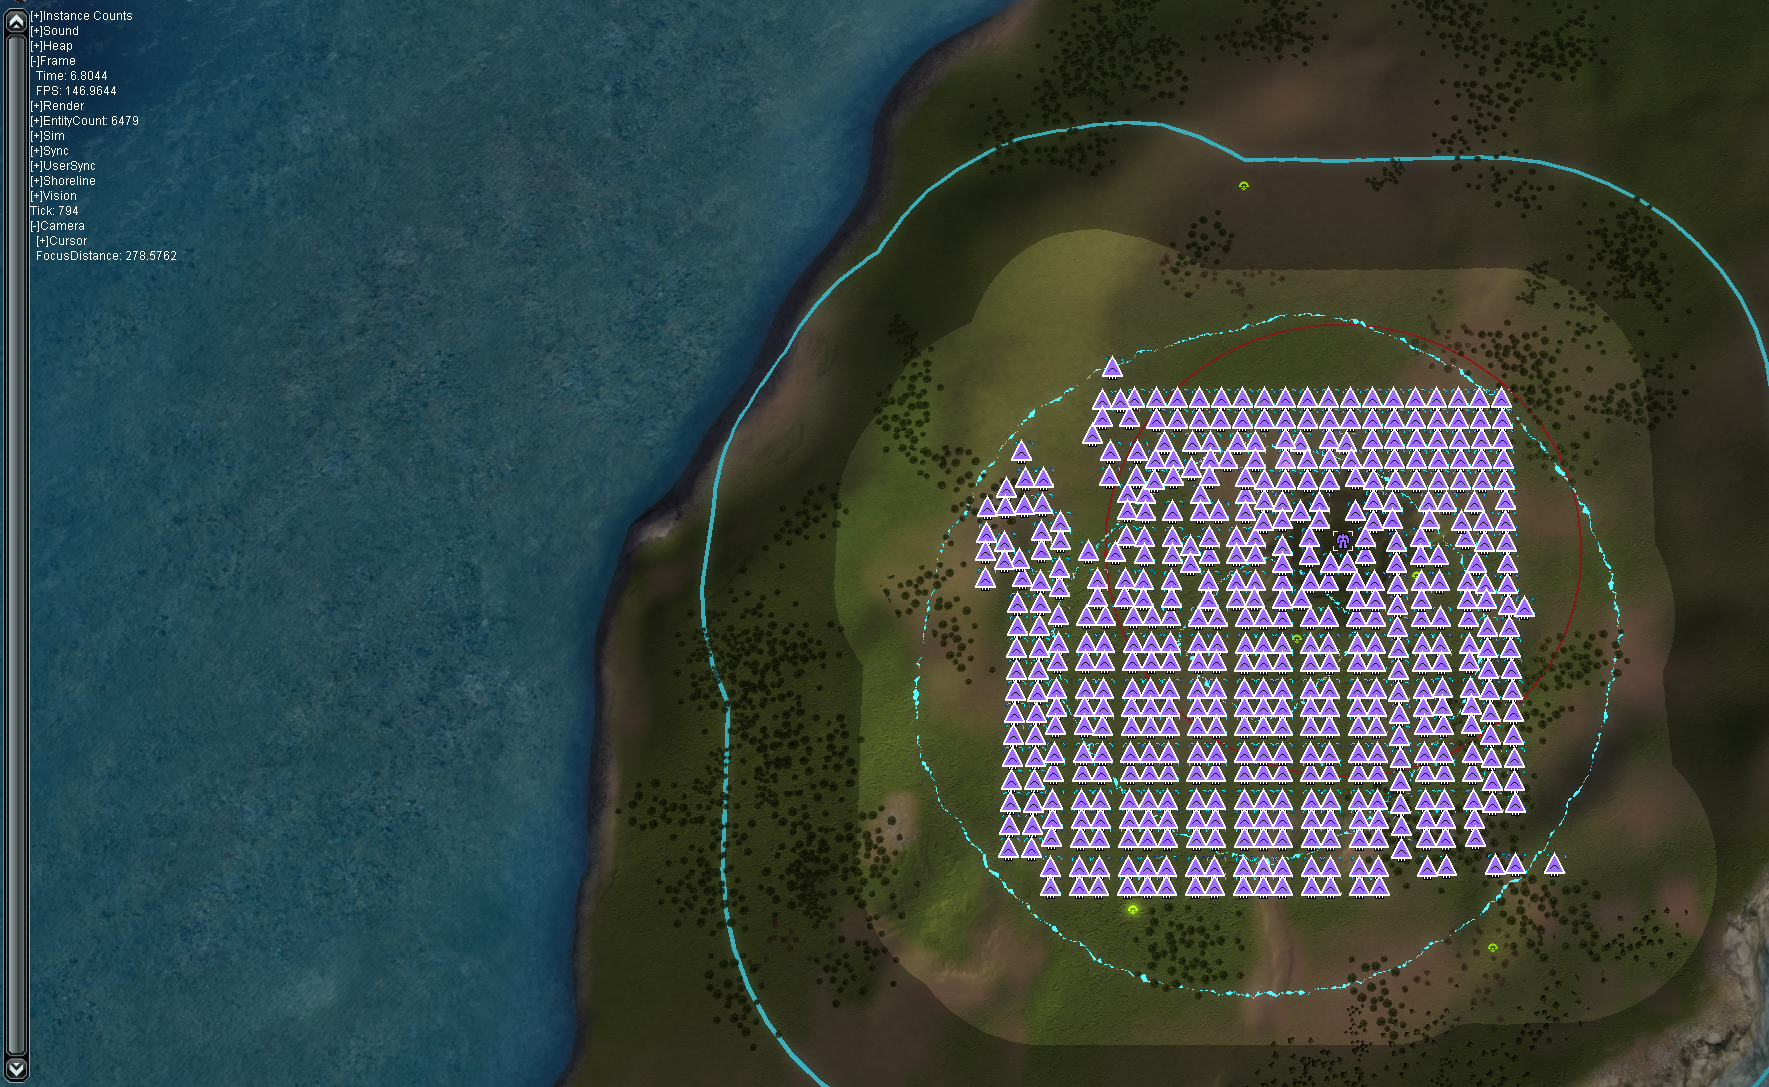
A Discord user asked in the general chat if there is an easy way to split up your selection. The answer is no - but the question is why? Why are there no tools to manage your current selection?
With this patch we're introducing a first batch of hotkeys that you can use to create subgroups of your selection, through which you can navigate. You can find them in the hotkeys menu:
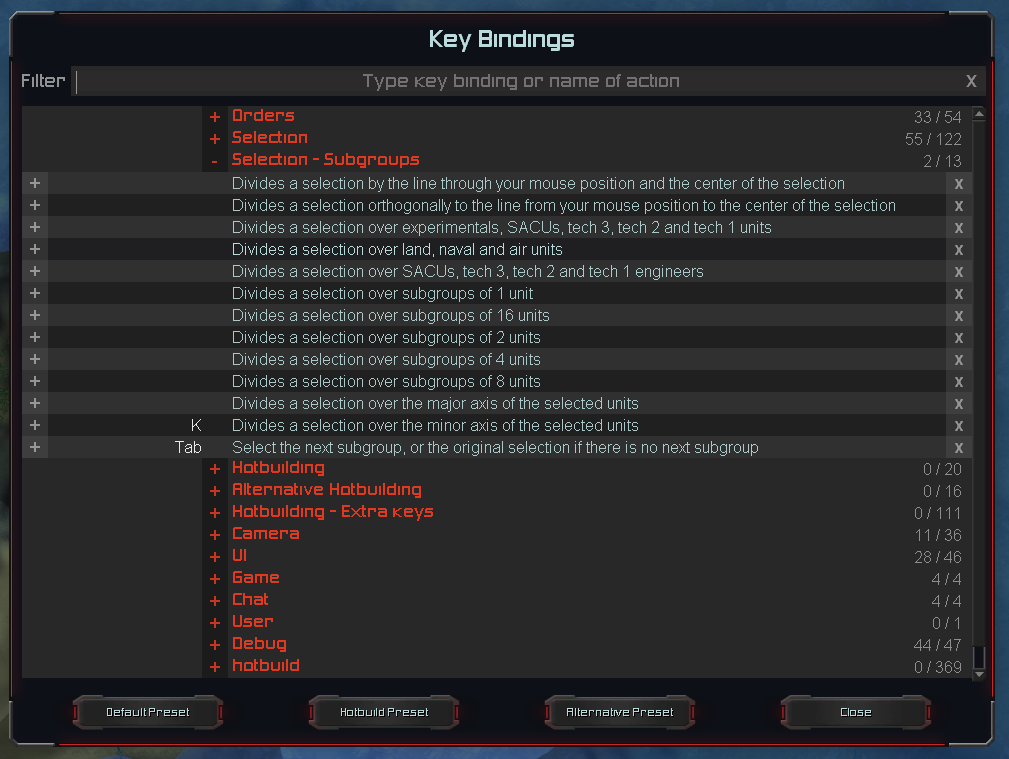
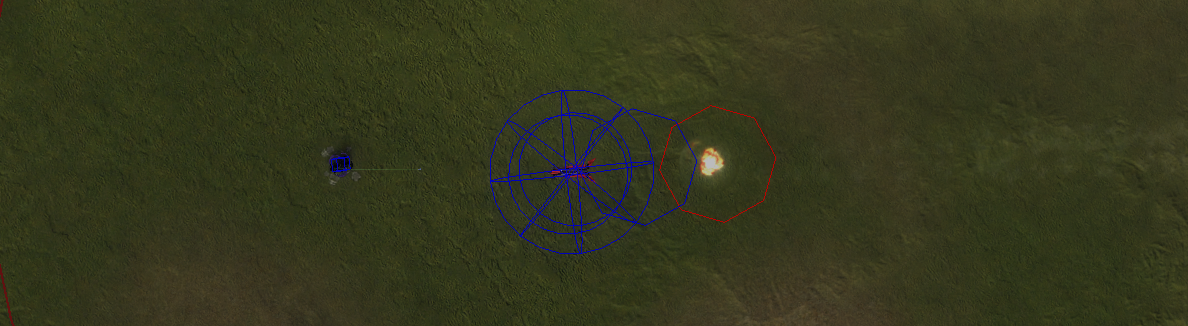
All these hotkeys divide your selection over a series of subgroups. You can then use an additional hotkey (in the screenshot it is Tab) to navigate through your subgroups. We'll take two examples:
Divides a selection by the line through your mouse position and the center of the selection
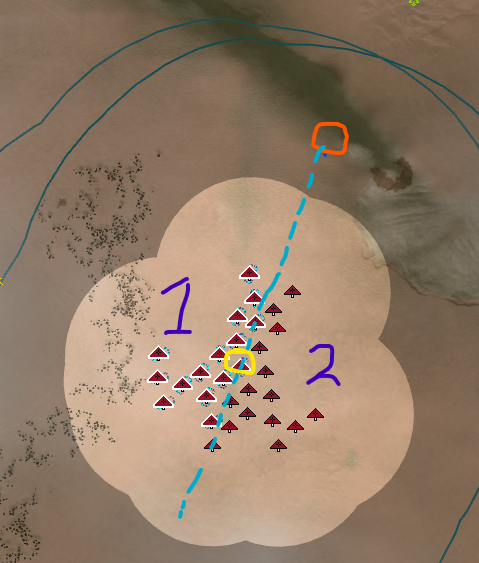
Divides a selection orthogonally to the line from your mouse position to the center of the selection
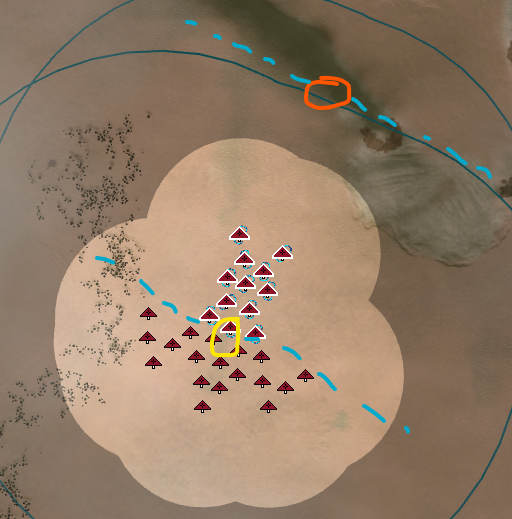
These two hotkeys allows you to divide your selection into two subgroups, which you can then quickly navigate between. The command mode (when the cursor changes to issue orders, for example reclaim, ground attack, launch orders ...) are not reset as you navigate between subgroups.
With this patch we at least introduce the following divisions:
- Divide over mouse axis
- Divide over orthogonal mouse axis
- Divide over major axis
- Divide over minor axis
- Divide over tech
- Divide over layer
- Divide over tech, but only include engineers
- Divide over subgroups of size 1
- Divide over subgroups of size 2
- Divide over subgroups of size 4
- Divide over subgroups of size 8
- Divide over subgroups of size 16
We hope this provides you with more control over your selection, and therefore with more control over your army. If you have ideas of other divisions or selection manipulation: feel free to jump into the suggestions channel in Discord and we can discuss them accordingly!
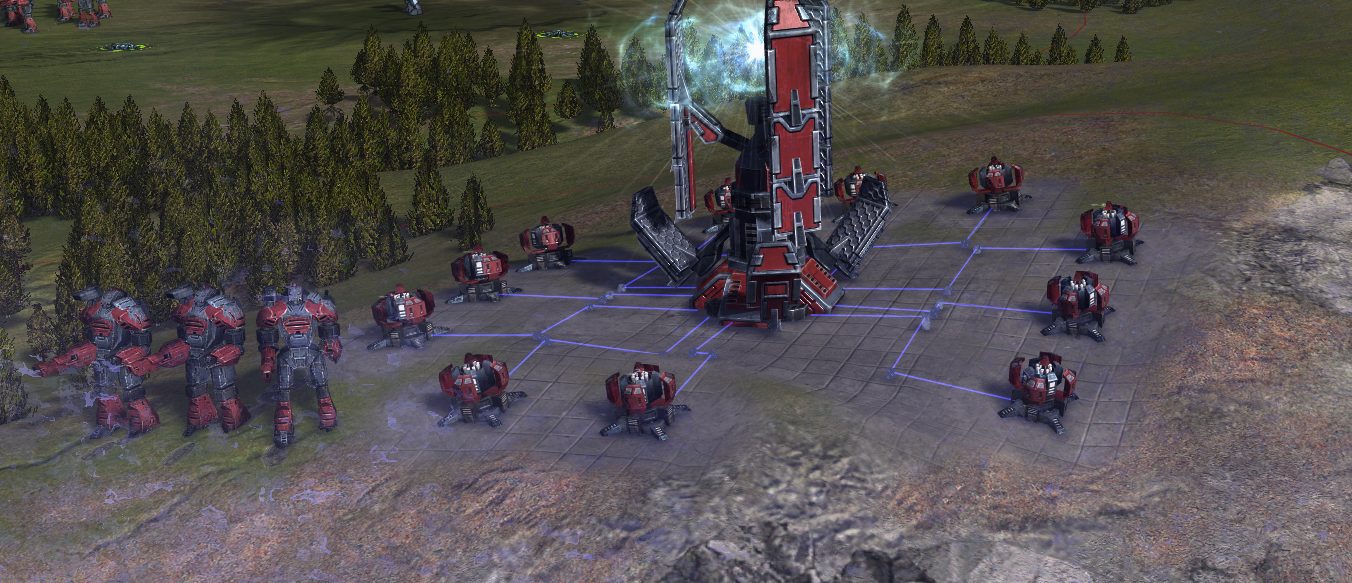
On top of that we are introducing various quality of life features. The first two features we'll reveal are about adding optional side effects when you issue an assist order. Specifically we're talking about these options:
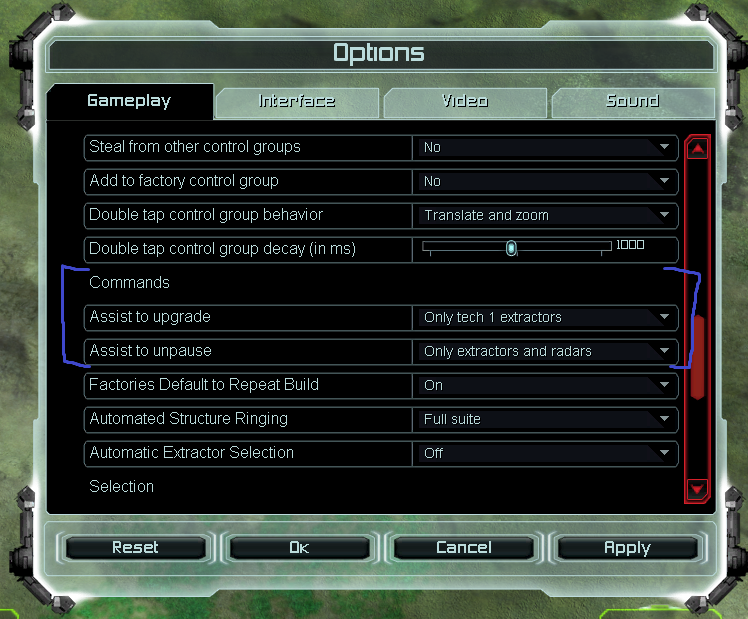
The option Assist to upgrade allows you to immediately queue up the upgrade of a tech 1 mass extractor as you issue the assist order. The option Assist to Unpause allows allows you to unpause extractors and radars as your units start assisting them. The former is useful for quickly queue up (assisted) extractor upgrades. The second makes it easier to focus your build power.
 . And to finish it all up the aesthetics of the game has been improved in various areas, such as how trees interact with the game.


 .
.