Starters guide to Mapping
-
Introduction
This guide will show you how to make a map that is vault ready and legal, I will focus on terrain, textures and markers.
Getting started
The first thing we need to do is familiarize ourselves with the vault rules if we want to upload our finished map to the vault,
https://wiki.faforever.com/en/Vault-Rules ,
we can then download some map editing software,
https://github.com/ozonexo3/FAForeverMapEditor/releases
once installed open the program and create a new map - file/new map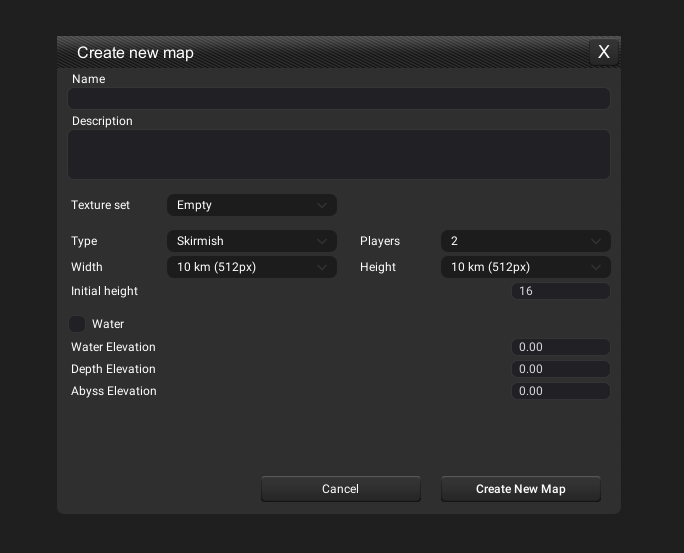
This will open up a window where you can name your map !!think carefully!! About this as changing it later can cause errors, certain naming conventions are against the rules (rule 10). Then you can give it a description now or you can do that later. Don't worry about the texture set leave it empty, the next option is type, leave it set to skirmish, then you can choose how many players you want to have, we can then move on to choosing our map size for your first map I would recommend either a 5 x 5 km map or a 10 x 10 km map, the next option allows us to set the initial height of the map I generally go for 100 as it allows space to move terrain down, you can't go into minus numbers for height, the next 4 options deal with water we will skip those for now as these can be edited later. We now have our blank canvas.
Terrain Tab
Sub tab terrain
When you click on the terrain tab you will see this
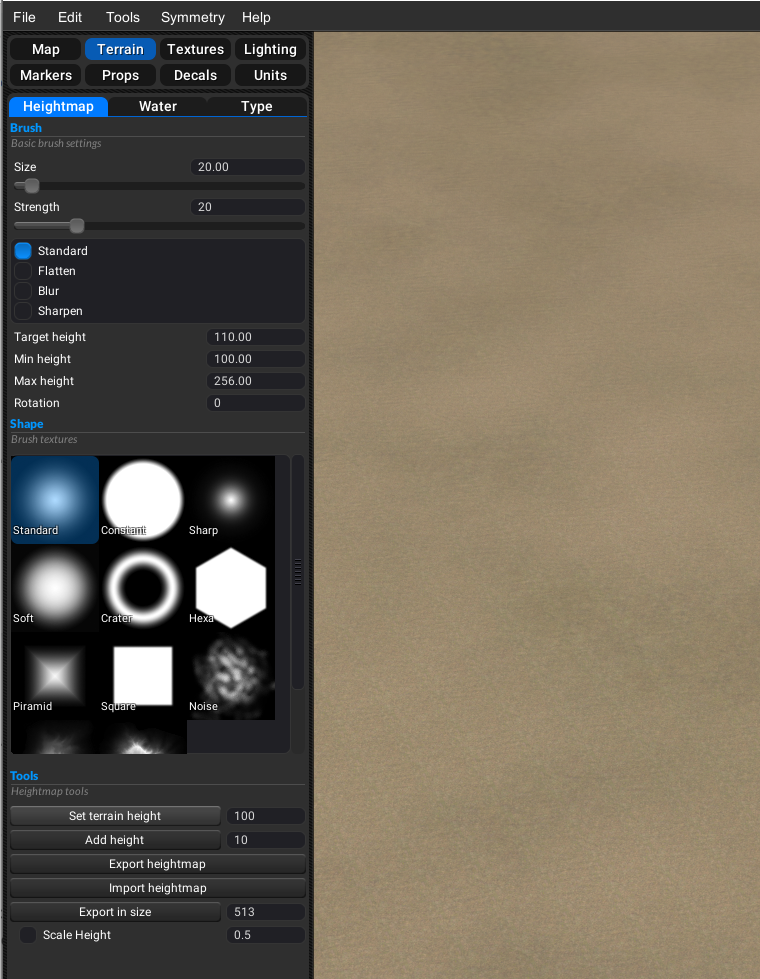
Size - change the size of your brush
Strength - change the strength of your brush
Deform - four options for how to deform the terrain *
Target Height - is the target height your brush will achieve
Min Height - minimum height for your brush
Max Height - maximum height for your brush
Rotation - the rotation of your brush this is in degrees
Brushes - are your brushes (custom ones can be added [link to guide todo])
Set Terrain Height - set terrain height will set all the terrain to that height (blank canvas)
Add Height - will add height to the terrain but preserve any editing you have done
The last 3 deal with exporting and importing height maps (not covered by this guide)*Standard – Will take the terrain to the height set in the target height
Flatten – Will take the average height under the brush and deform the terrain to that
Blur – Will smooth out the terrain under your brush
Sharpen – Is the opposite of blurSub tab water
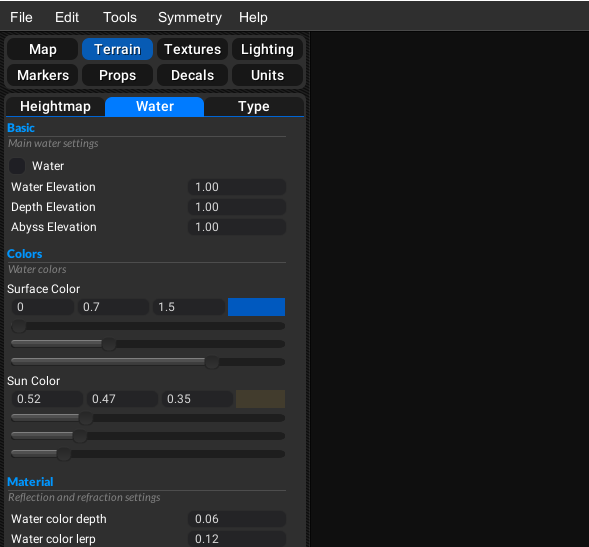
We will only look at the first 4 options in this guide ;
Water - water on or off
Water depth - the height of the water
Depth Elevation - depth elevation unused function
Abyss Elevation - abyss elevation the height at which the water will turn darkMore information on water settings can be found here https://forum.faforever.com/topic/59/about-water-introduction
Symmetry
If you are wanting any symmetry now it the time to choose it via the symmetry settings here are some examples

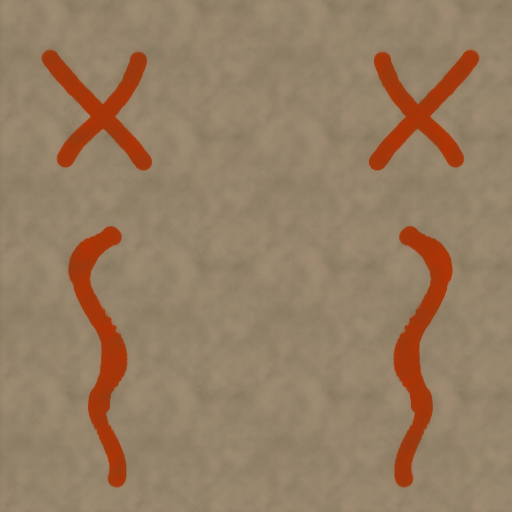 X symmetry
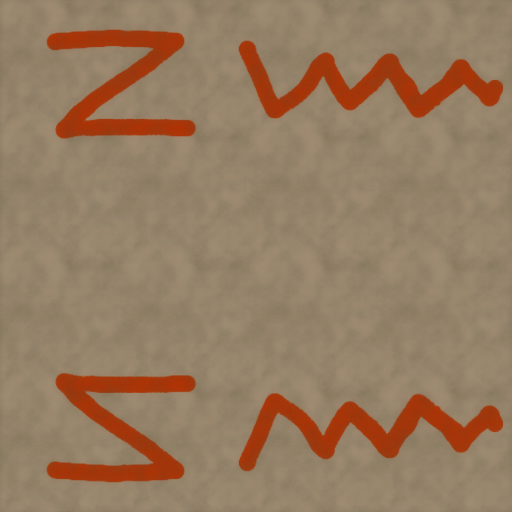 Z symmetry
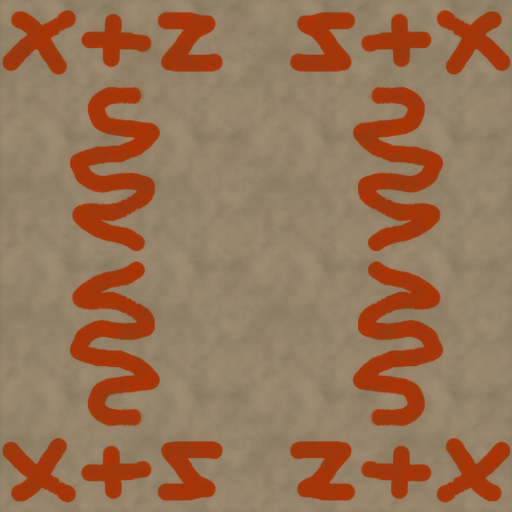 X+Z symmetry
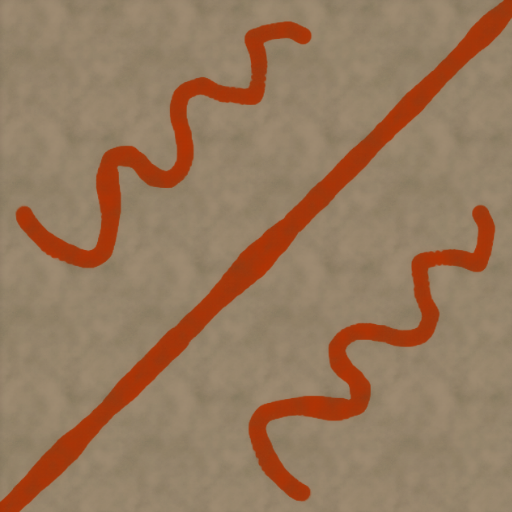 Diagonal symmetry top left - bottom right
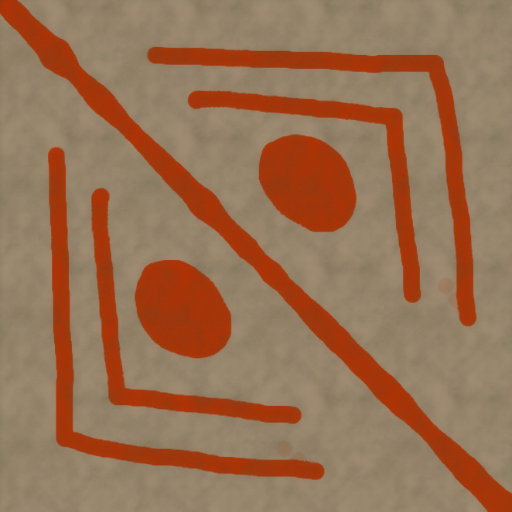 Diagonal symmetry Bottom left - top right
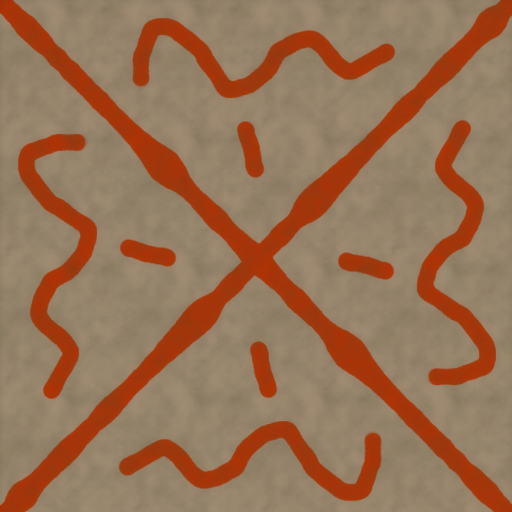 Diagonal +diagonal
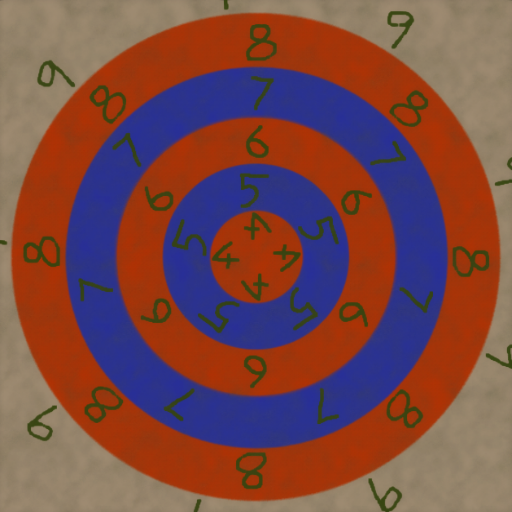 Center by angle
We can now start to create our terrain by using the options above, the only advise I will give is not to set your brush strength to high, and use ctrl g to switch to slope view which will show you where units can and can't path to and if ground is flat enough to build a base.
Texture Tab
Here we can choose our textures and paint them you have 9 layers total you can use lower and layer 1 – 8, this is where a lot of new mappers fall foul of vault rules [rule15], Your map should have the lower, upper and 3 layers filled. Make sure you have tterainxp shader on in the sub tab settings.
Sub tab layer
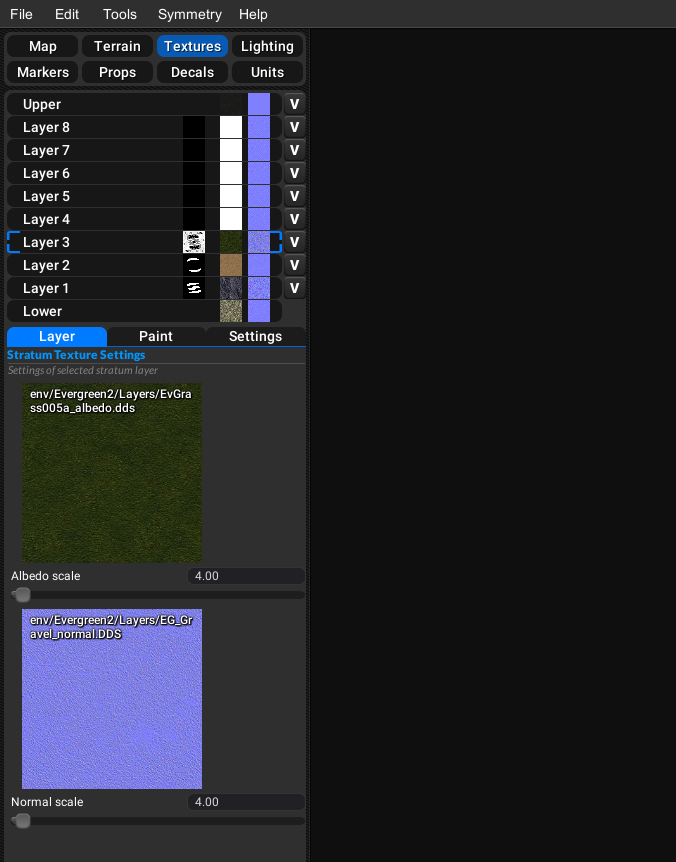
Here you can assign textures to each layer just click on the texture image to open the resource browser, here you can select your texture and normals just drag it to the image. You can also change biomes with the type drop down menu, once you have chosen your texture and normal you can change the scale of them with the slider underneath, repeat for all the layers you are going to use.
sub tab paint
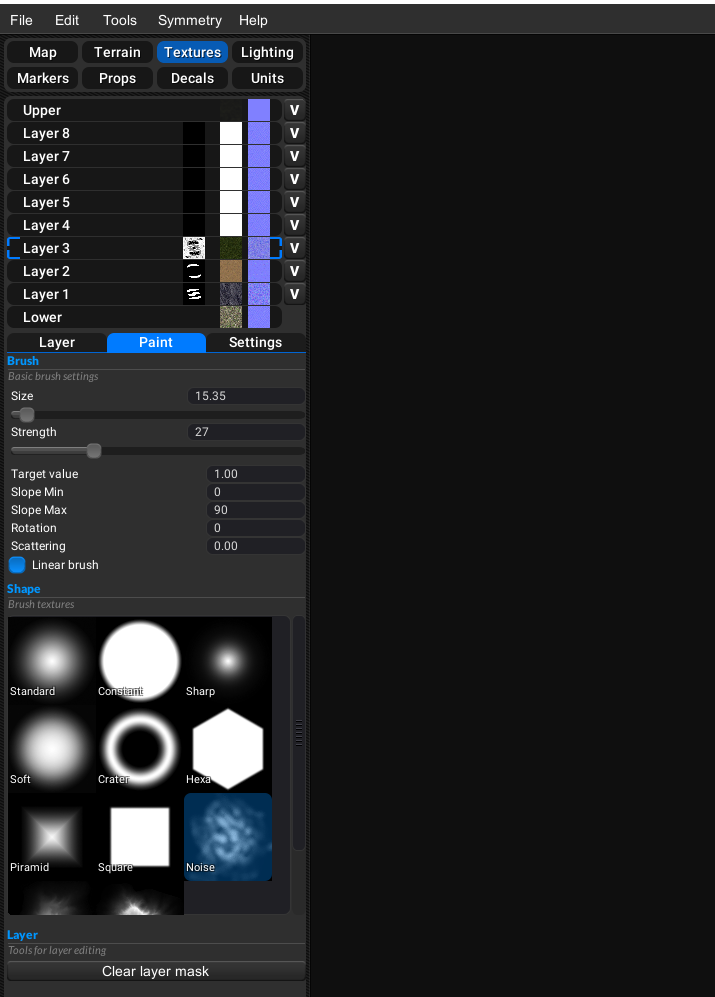
Brush size - Size of the brush that we want to paint with.
Brush strength - Strength with witch brush changes are applied to layer mask.
Target value - Target opacity, that brush will change mask into when painting, values can be from 0 to 1
Slope min - Minimum terrain slope value for painting, allow for excluding flat surfaces from paint
Slope max- Maximum terrain slope value for painting, allow for excluding cliffs from paint
Scattering- Randomize brush position. It's great for blending textures and adding noisy details to flat terrain.
Linear brush is an improved brush behaviour. Supcom terrain shader is not blending layer directly by mask, but it's converting it to be more contrasted. Selecting brush to be linear will compensate for that change, allow painting to be more smooth.sub tab settings
Here you can move your layers up and down, you also have options to import and export stratum masks, settings and templates, Make sure you have tterainxp shader on.
With these settings we can now paint our terrain in detail, for more information here are some links to more specific guides on texture painting
https://www.youtube.com/watch?v=nzTnDc2vKU4&t=3s
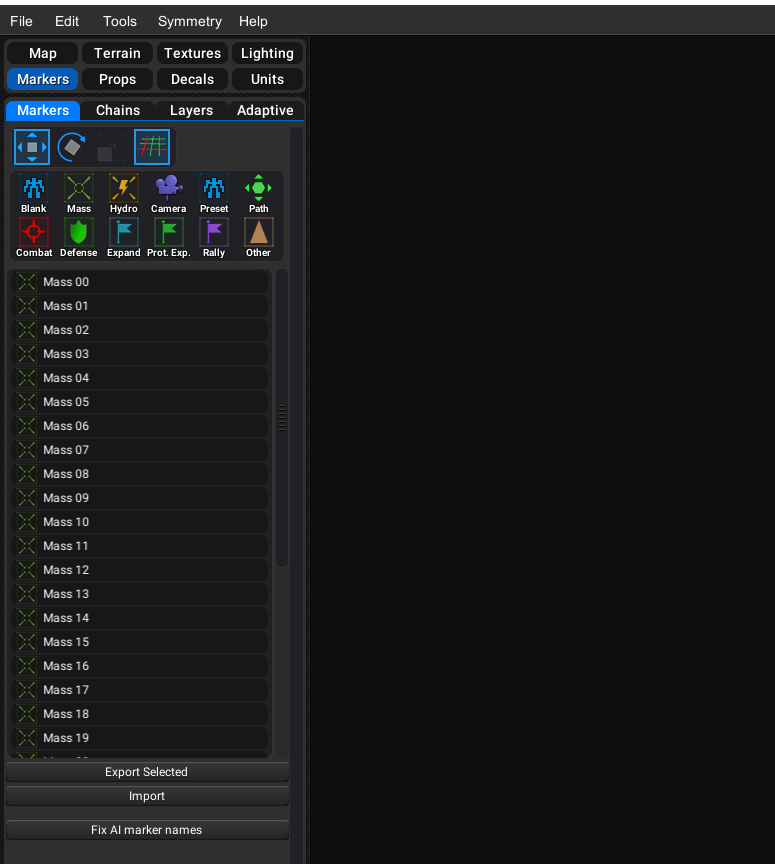
https://forums.faforever.com/viewtopic.php?f=53&t=18647&p=181228&hilit=texture+guide#p181228Markers Tab
For this guide we only need to concern ourselves with 3 marker types the spawn markers, Mex and hydro markers, the spawn markers will already be placed on the map, However you will have to add the mex and hydro markers to your taste by simply placing them.
link to map editor wiki https://wiki.faforever.com/index.php?title=FA_Forever_Map_Editor#Introduction
link to maps and mods discord https://discord.gg/gN4SdPb![z smy.png] -
Detailed explanation. Do you have any plans to continue this series?
I have made a first attempt at creating a map. I am now at the point that I have placed all decals for mass and hydrocarbons.
I want to make my map 'adaptive', I have linked all mass- and hydrocarbon markers to the appropriate ARMY_#. Do I have to link the mass & hydrocarbon deposit decals to the appropriate ARMY_# too?WIP - Adaptive Switcheroo

It could be of much help to see this series continued with explantations of 'props', 'decals' & 'units'. There is some detail and explanation on the help page for the editor, unfortunately some import subjects are left untouched. Thanks for your work thusfar.
I used Ozonex map editor.
These posts touch a bit on the subject, they really delve into a more detailed aspect but don't seem to explain how the decals interact with the markers.
-
between me and jip we are going through what tutorials are available and whats missing and updating as needed so there will essentially be a master guide in one place (soon
 ) In answer to the decals i don't believe its possible to make them adaptive i.e. you can't link it to whether the resource spawns or not, i don't think the code is currently in place to allow this, but would love to be proven wrong on this tho. Your map is looking good, but i'd go careful with the narrow paths they will cause path finding issues
 -
You can spawn decals dynamically and you could theoretically place them adaptive too. The code doesn't support it in its current state, I'm experimenting with dynamically placing decals in one of the Nomad missions
") .
. -
Good to hear! I am eagerly awaiting..
So how do the 'adaptive' maps work then? Mass decals with no markers?
-
they are technically props that are placed where the marker is and you choose through the options which ones spawn here's the relevant code
function spawnresource(Position,restype, spawnhpr) --check type of resource and set parameters local bp, albedo, size, lod; if restype == "Mass" then albedo = "/env/common/splats/mass_marker.dds"; bp = "/env/common/props/massDeposit01_prop.bp"; size = 2; lod = 100; else albedo = "/env/common/splats/hydrocarbon_marker.dds"; bp = "/env/common/props/hydrocarbonDeposit01_prop.bp"; size = 6; lod = 200; end --create the resource CreateResourceDeposit(restype, Position[1], Position[2], Position[3], size/2); --create the resource graphic on the map if spawnhpr then CreatePropHPR(bp, Position[1], Position[2], Position[3], Random(0,360), 0, 0); end --create the resource icon on the map CreateSplat( Position, # Position 0, # Heading (rotation) albedo, # Texture name for albedo size, size, # SizeX/Z lod, # LOD 0, # Duration (0 == does not expire) -1, # Army (-1 == not owned by any single army) 0 # Fidelity ); end -
Ok I might've bitten off too much to chew, I will be visiting the discord for further assistance.
-
you don't really need to know the code to much to or at all really all your doing is changing variables, copy pasting code and making a table which by the sounds of it you've already done. here's my updated guide to adaptive maps https://forums.faforever.com/viewtopic.php?f=53&t=19242
-
Thanks for this. It seems I did not search the forums well enough.
-
The decals & props for both 'Mass' & 'Hydrocarbon' deposits are automatically placed on the markers when you have the 'adaptive' script enabled', I did not have to align them manually in the editor. Possible obvious mistake but maybe this will save someone some time.
Thanks again for the guide MadMax, I followed it step by step and have my first 'adaptive' map working now
-
i see you meant the stock decal and props and there was me giving you the complex answer when the simple one was what you wanted
-
Happy accident
-
@Stealth9 said in Starters guide to Mapping:
The decals & props for both 'Mass' & 'Hydrocarbon' deposits are automatically placed on the markers when you have the 'adaptive' script enabled'
It does this regardless if you have the script or not.
-
Ok, so when using Ozonex Map Editor I only have to place markers for resources. Is this the same in the gpg map editor?
-
yes but gpg lacks the mirroring functions of ozonex
Hello! It looks like you're interested in this conversation, but you don't have an account yet.
Getting fed up of having to scroll through the same posts each visit? When you register for an account, you'll always come back to exactly where you were before, and choose to be notified of new replies (either via email, or push notification). You'll also be able to save bookmarks and upvote posts to show your appreciation to other community members.
With your input, this post could be even better 💗
Register Login