-
Parts
- Introduction
- Settings from a practical perspective
- Settings from a theoretical perspective
- Wave generation
- Brushes
- Ramp
- Environment maps
- Wave normal maps
- Pixelated water
Requisites
Image editing tools, such as:
Map editing tools, such as:
On the 30th of September, 2020 the Ozonex editors renders water differently than in the game. Thus it is not representative to what you would see while playing. On the contrary, the GPG editor utilizes the exact same procedures as the game does and is therefore representative. If this is no longer the case when you read this - do notify me and I'll remove this paragraph
 .
.For this article I assume that you have extracted all the textures the game has to offer. If you have not done so and / or do not know how to extract all the texture, I advise you to check the FAQ in the overview article. There is entry explicitly on how to do this properly to allow the GPG editor to generate the correct relative paths to the textures.
Definitions
Normal map
A normal map is commonly used in older rendering engines in order to create detail that cannot be represented by the geometry of a shape. This is quite a sentence and I encourage you to look at the following article:Water map
A water map is a lot like the common normal map, but with a different interpretation of the alpha channel. And because of this difference I do not just call them normal maps, but water maps because the alpha channel is only taken into account when it is used to render water. This article describes the exact interpretation in depth.Waves and normal maps
It is important to understand the goal of this article. Personally I like to work backwards: we start looking at the end result along with the context and then try to understand how this is accomplished.
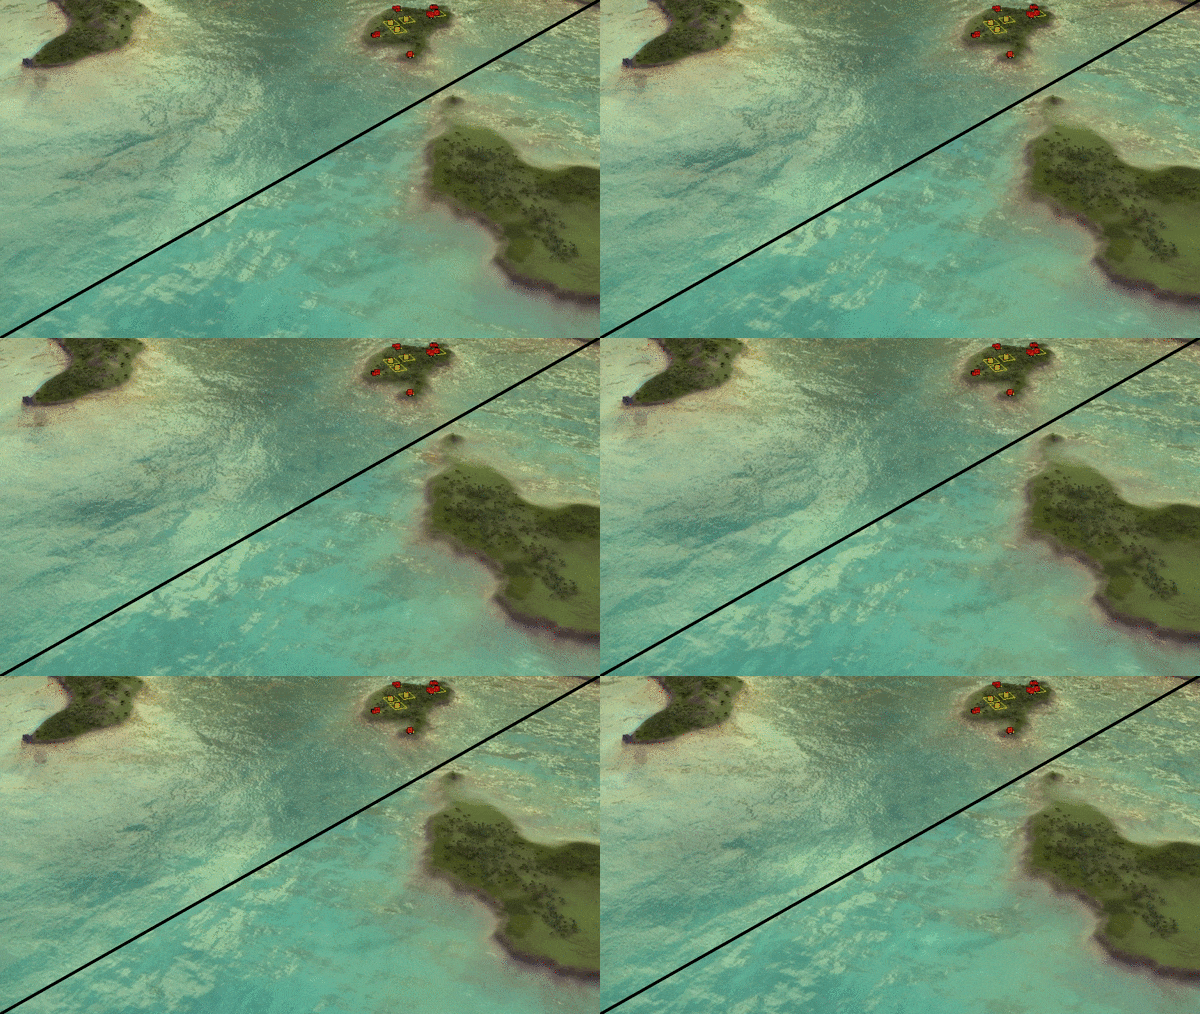
A visual comparison between different types of wave normal mapsFor more context on what this all means I encourage you to open up the GPG editor and import the following water settings:
- https://github.com/Garanas/Map-development-guides/blob/master/water - waves and normal maps/water-settings-a.lua
- https://github.com/Garanas/Map-development-guides/blob/master/water - waves and normal maps/water-settings-b.lua
- https://github.com/Garanas/Map-development-guides/blob/master/water - waves and normal maps/water-settings-default.lua
You can either download the file or create a new file with a .lua extension. Once inside the GPG editor you can import the configuration via File -> Import -> Water.
For this article we'll look into how the waves on the water surface take shape. This is accomplished by combining various water maps. We'll discuss where we can find the assets regarding to water that the game provides, how we can interpret these assets and how we can make our own.
Assets
The game provides a bundle of water maps by default. These are used throughout the default skirmish and campaign maps. Assuming that you have extracted the textures correctly previously, you can find them at:
%InstallationFolder%/textures/engine/
Once inside you'll find a bunch of water maps:
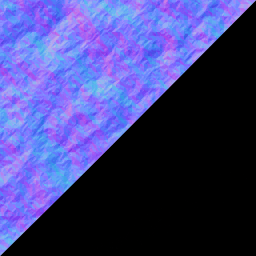
waves.dds (no foam channel)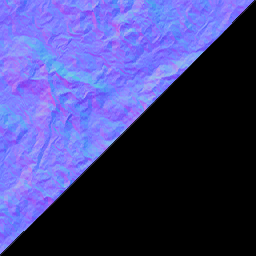
waves000.dds (no foam channel)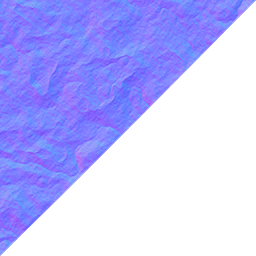
waves7.dds (completely white foam channel)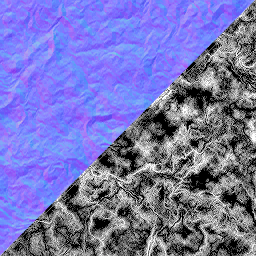
waves001.dds (with foam channel)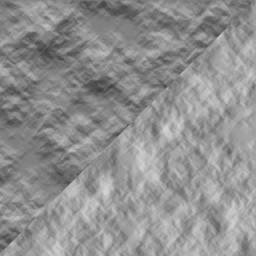
waves6.dds (with foam channel)For each image, the normal map is in the top left and the alpha channel is in the bottom right part.
You are not limited to using these - any repeating normal map can be used! You can think of normal maps that are generally used as strata textures. This can create all kinds of interesting effects. A typical normal map will have an opaque alpha channel - this may cause the water surface to become completely white. When this happens, read the next section carefully: not all normal maps are fit as a water map out of the box.
Properties of a water map
A water map is the typical purple-looking normal map one would expect, including an interesting interpretation of the alpha channel.
- R channel: x offset
- G channel: y offset
- B channel: z offset
- A channel: foam value
The latter indicates whether or not there is foam on the water. Foam is generated when the total foam value after combining the various water maps is larger than 1.0 (more than white). This effect is generally not visible because the majority of the wave maps provided to us have a black alpha channel. The only reasonable assets that generate the effect is waves001.dds and waves6.dds.
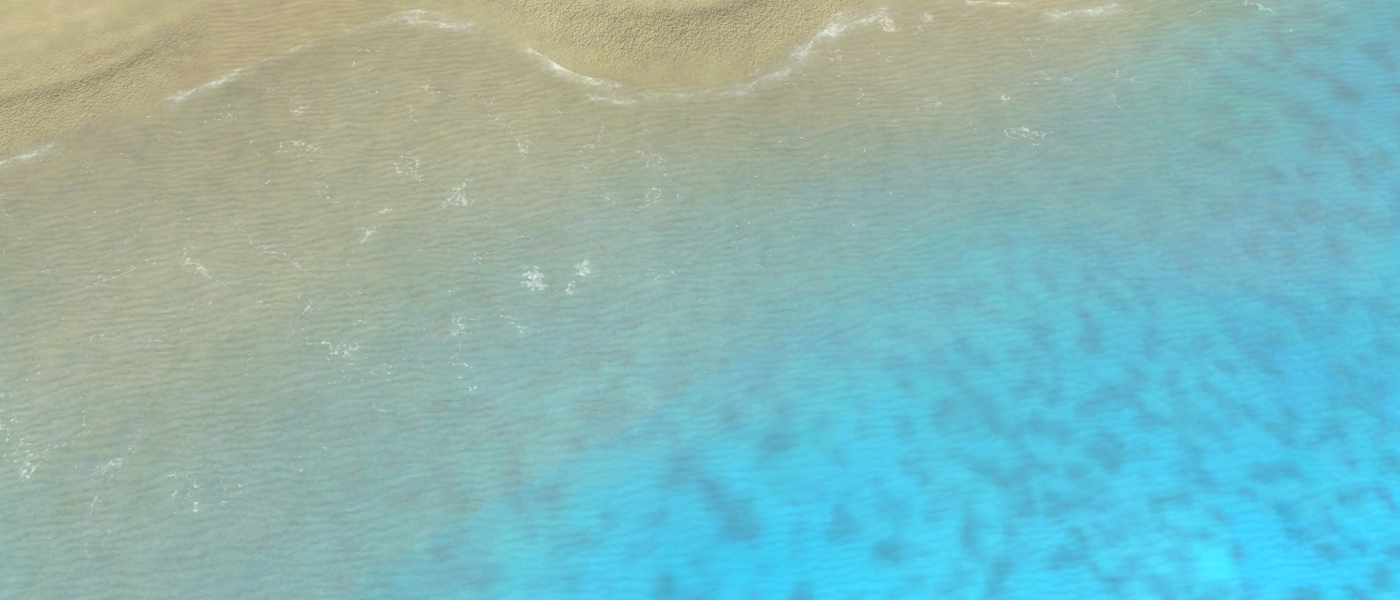
Water of the map Paradise, with foam on the top left and without foam on the bottom rightWhen you open up the standard map Paradise (scmp_035) you can see one of those water maps among the water properties, in turn generating a small foam effect.
Changing the water maps and their properties
Using the Ozonex editor.
On the 30th of September, 2020 the Ozonex editors renders water differently than in the game. Thus it is not representative to what you would see while playing. On the contrary, the GPG editor utilizes the exact same procedures as the game does and is therefore representative. If this is no longer the case when you read this - do notify me and I'll remove this paragraph
 .
.Using the GPG editor
Enable the Water layer (F9) and click on 'Water Properties' in the toolbar of the editor. The tool window will respond and change into a 'Water Properties' window. For this article we're interested in the very last properties: the texture, direction, speed and frequency of the water maps.
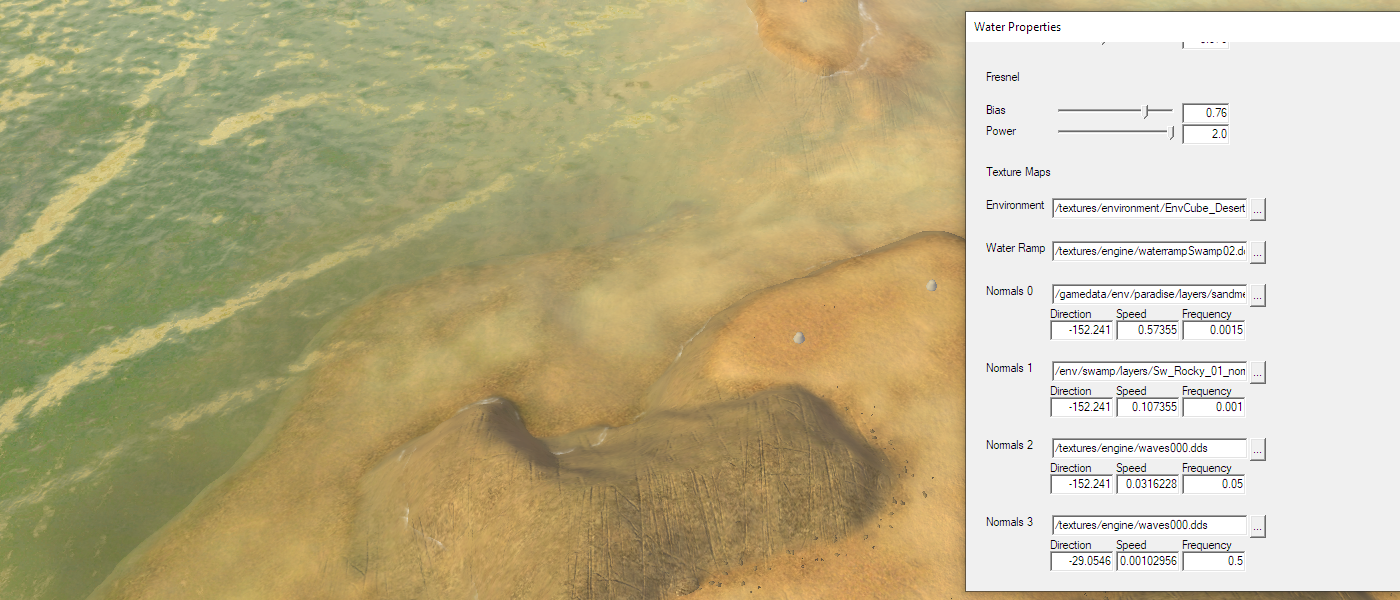
Showing the properties in which we're interested in for this articleAssuming that you have extracted the textures correctly previously, click on the '(...)' button and navigate towards the location where they should be stored:
%InstallationFolder%/textures/engine/
Choose any of the water maps and start experimenting with them.
Other interesting properties are the direction of a normal map, its speed and how often it is repeated on the water surface. You can change these live in the GPG editor:
Direction: Water starts movingtoward top/north. Increasing the number will rotate the effect clockwise.
Speed: The speed in which the water moves, the lower the value the slower the water moves.
Frequency: The size of the texture on the surface. Lowering the value causes the texture to be tiled more on the water surface.
Toying around with the water maps and these settings can create all sorts of interesting effects. From here on the journey is yours. Feel free to share your findings in the comments below!
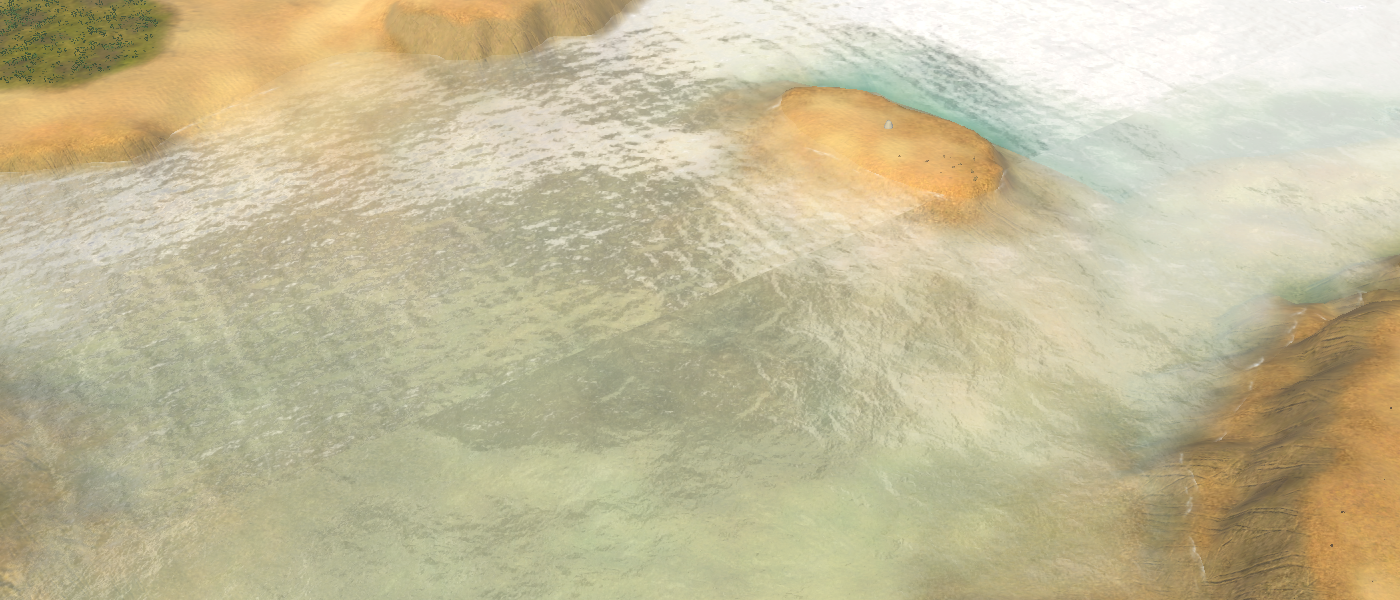
A visual comparison after changing some of the wave normal mapsCustom water maps
You can store water maps inside your map folder. For stratum textures and decal textures there is a specific location where these should be stored. For water there is no hierarchy that you need to use in order for the game to find the files. It is good practice to store them inside the env folder that the other textures require in order to function - this keeps it organized.
As an example, you can store them in:
%MapName%/env/For this tutorial we'll use the following normal map:
You will need an account to be able to download the normal map. The website is free and you will get 15 points for free each day allowing you to download seamless textures. If you are aware how hard it is to make these kind of textures then you know we are practically robbing them via their own freemium model. Do take note of the license on the textures - as an example we cannot share them without explicitly using them and you need to mention the source in the description of the map.
Any normal map texture from the internet will likely have a fully opaque alpha channel. We just learned that this is used to generate foam on the surface therefore you may want to make it black or give it some interesting shape. Save the texture in the .dds format. You can do so by opening it in your favorite image manipulation program that supports the .dds format, such as Gimp or Adobe Photoshop. Use BC3 / DXT5 as your compression algorithm.
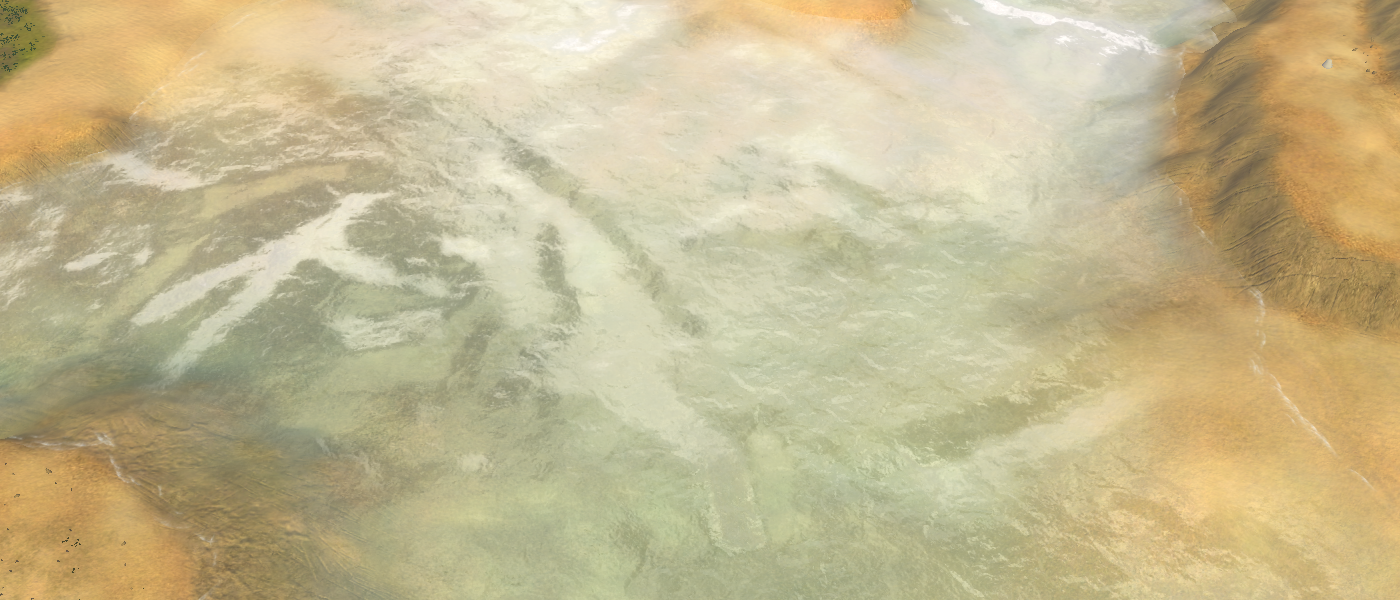
A visual example of water that appears to have really large waves in itWhen you upload the map to the vault the name of the folder of your map is changed. The path to your custom textures is not adjusted accordingly, in turn the game cannot find the corresponding textures.
To approach this you can use the Ozonex editor to bump your map version which creates a new folder with the correct version and in turn you can use the GPG editor to set the corresponding paths to the new folder structure. When uploading the name of the folder of the map no longer needs adjusting and everything will be good.
Under the hood
With Supreme Commander we are in a unique position in which we can not only toy around with the graphical assets, we can also see how these assets are used in the rendering pipeline of the game. The (HLSL) shaders can be found at:
%InstallationFolder%/gamedata/effects.scd
To strengthen our understanding of this article it is nice to see how the assets are used in the rendering pipeline. For this article, the following bit of code inside the water2.fx file is particularly interesting.
float4 HighFidelityPS(...){

    // (...)

    // calculate the normal we will be using for the water surface
    float4 W0 = tex2D( NormalSampler0, inV.mLayer0 );
    float4 W1 = tex2D( NormalSampler1, inV.mLayer1 );
    float4 W2 = tex2D( NormalSampler2, inV.mLayer2 );
    float4 W3 = tex2D( NormalSampler3, inV.mLayer3 );

    float4 sum = W0 + W1 + W2 + W3;
    float waveCrest = saturate( sum.a - waveCrestThreshold );

    // average, scale, bias and normalize
    float3 N = 2.0 * sum.xyz - 4.0;

    // flatness
    N = normalize(N.xzy);
    float3 up = float3(0,1,0);
    N = lerp(up, N, waterTexture.r);
    // (...)
}
The waves that makes the water appear so alive is nothing more than a summation of a bunch of normal maps, each at a different position to simulate the idea of movement.
The values mLayer0 up to mLayer4 are computed in the vertex shader, at an earlier stage of the pipeline. In turn these values are used to get pixel information from a texture using tex2D along with the according texture samplers that describe how certain situations should be taken care of and the coordinates that we wish to sample.
After which the various normal maps summed together, resulting in a single vector. The vector is first used to compute the wave crests values that in turn are used later as part of generating the white foam on the surface water. Take note that the foam value solely uses the alpha channel! The normal is adjusted accordingly to match the fact that we added four normal maps together. It is then used for lighting, reflection, refraction and speculation computations down the road.
The flatness that we can define in the editor is applied as a linear interpolation between the up vector and the normal computed at the surface of the water. The more we flatten the water, the less of the computed water normal will be used and therefore the water will appear to be more uniform.
For more information on the operators used:
- https://developer.download.nvidia.com/cg/tex2D.html
- https://developer.download.nvidia.com/cg/saturate.html
- https://developer.download.nvidia.com/cg/normalize.html
- https://developer.download.nvidia.com/cg/lerp.html
Frequently asked questions (FAQ)
The water turned all white
You' are using water maps that have (completely) white alpha channels. The alpha channel is interpreted as foam. If you want to use those water maps, change their alpha channels to black (no foam) or some other pattern to introduce foam in a more natural manner.
For the first normal map that has a white alpha channel this doesn't have an effect. Foam is rendered on the water surface when its value is larger than 1.0. In other words: when the combined normal maps have an alpha channel that is more white than white itself.
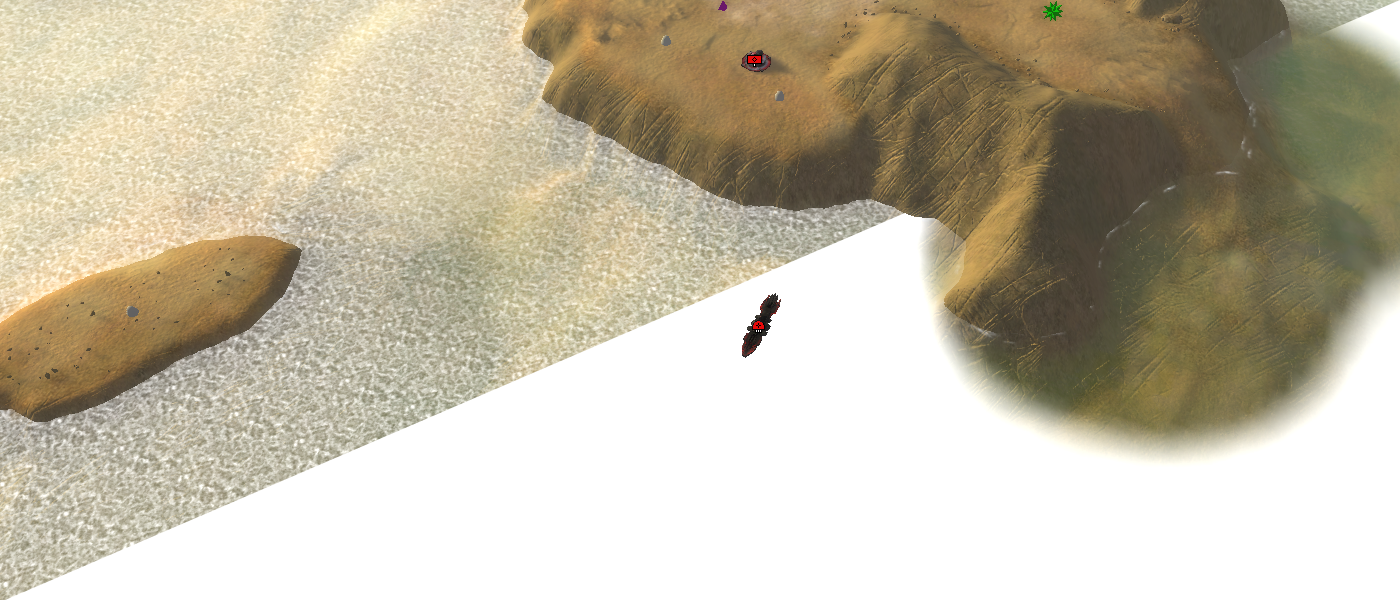
Two examples of problems with foamCustom water textures do not work in-game
When you upload the map to the vault the name of the folder of your map is changed. As an example,
from: %MapName%/
to: %MapName%.v0001/.The path to your textures is not adjusted accordingly and in turn the game cannot find the corresponding textures when you download the map from the vault.
To approach this you can use the Ozonex editor to bump your map version and then use the GPG editor to set the corresponding paths. The Ozonex editor already prepares the correct name of the folder of the map. When you upload the map no adjustments are required and therefore no renaming happens.
Further reading
For more information on normal maps in general:
For more textures that you can use in your projects:
About you
If you have interesting sources, approaches, opinions or ideas that are not listed yet but may be valuable to the article: feel free to leave a message down below or contact me on Discord. The idea is to create a bunch of resources to share our knowledge surrounding development in Supreme Commander.
If you've used this resource for one of your maps feel free to make a post below: I would love to know about it!
Special thanks to @keyser for providing feedback on the article.
-
This post is deleted!