About the Ozone Editor: adding your own brushes
-
Requisites
Map editing tools, such as:
This article does not support the old GPG editor.
About brushes
A brush is nothing more than a greyscale map in terms of sculpting. We'll take two examples from the Ozone editor:

The default brush
A cliff-related brushWhen we apply a brush during sculpting we're pushing the terrain upwards. The more white the brush is, the more it will be pushed. Black parts of the brush will not affect the terrain.
Adding your own brushes
You can add your own brushes in the Ozone editor. Metaphorically it is like adding a more refined tool to your toolkit. Some shapes are harder to sculpt into the terrain than others and having your own custom brushes for those situations can be quite useful!
As an example we use the scenario where we want a ramp that has a slight twist in it.
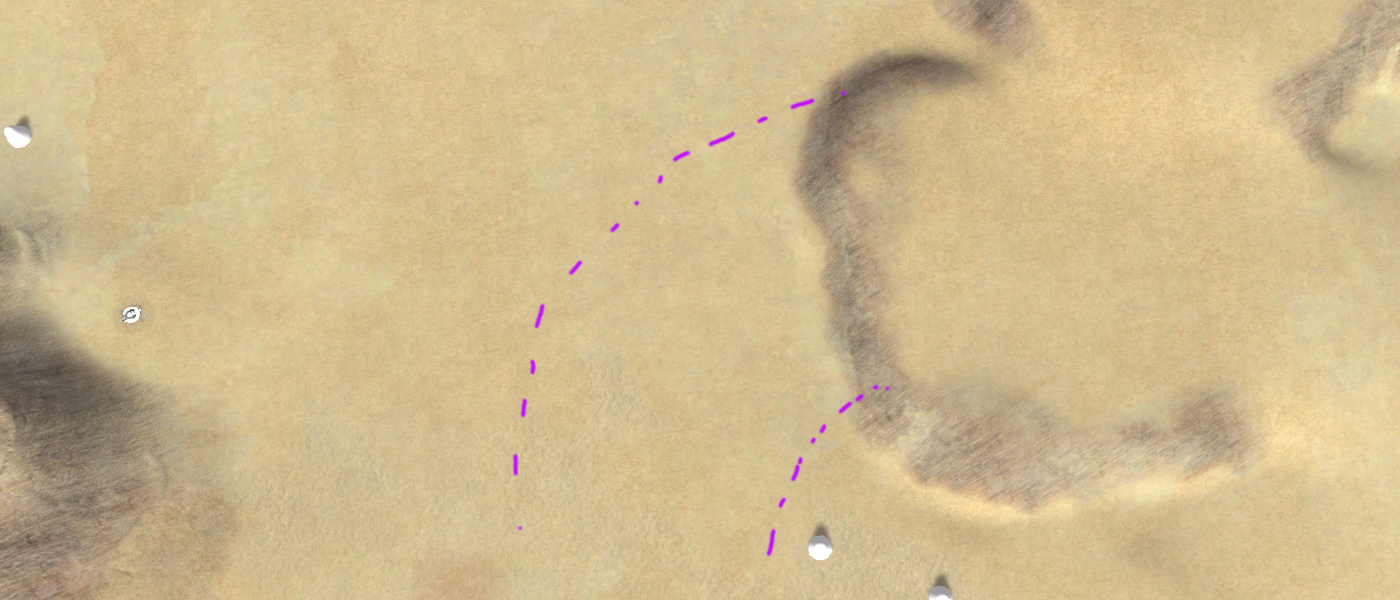
An example of a ramp with a slight twist in itWhen you'd create such a ramp by hand it may take some time by using various of the tools. And if this is a common ramp in your map design then automating this with a handy brush is quite welcome.
Therefore one can introduce a texture that allows us to more easily create such a situation. Generally I'd like to take an image from the internet but because I couldn't find one with a friendly license I made one myself. I present:

A texture named super-twisted-ramp-generator-alpha-d.pngTo add our brush we have to add it to the folder of brushes. Navigate towards:
%FAF-EDITOR-PATH%\FAForeverMapEditor_Data\Structure\brush
And add your texture to that folder. Make sure to restart the Ozone editor if it was still open. When starting the editor the texture is ready for use as a heightmap brush for sculpting and as a texture brush for painting.
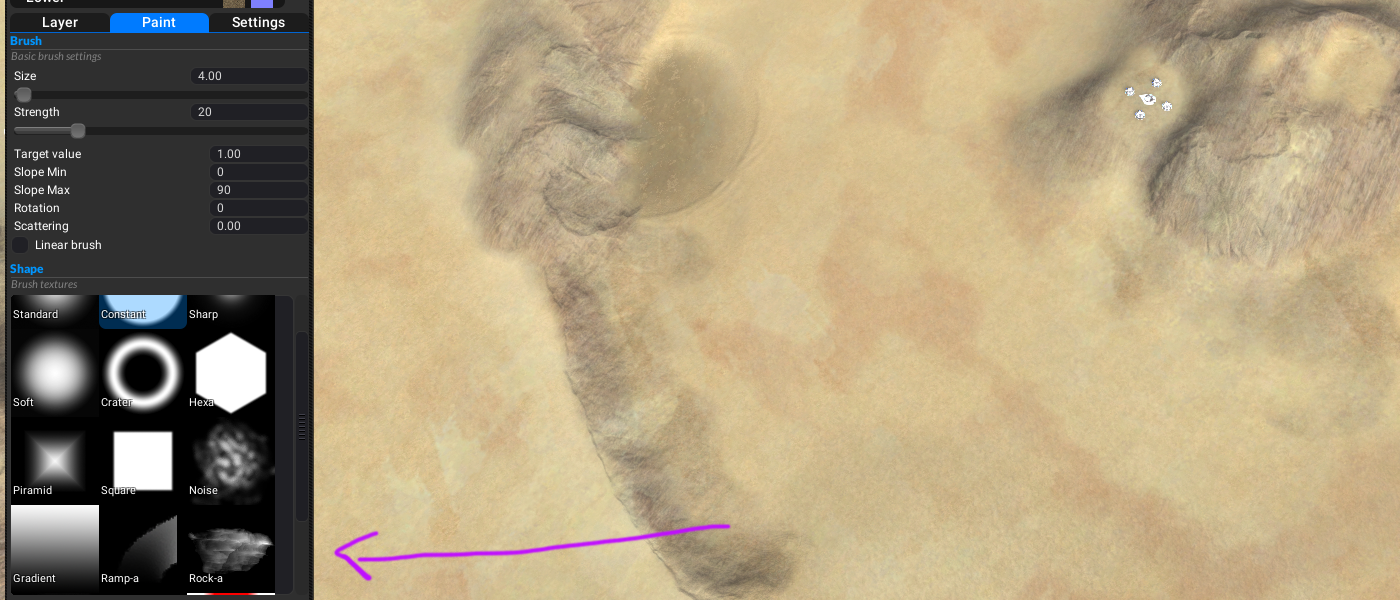
Our custom brush is visible in the editorWith that new brush added to our tool kit we can jump right in and start applying it to our terrain.

An example of the output of the new brush with slight further editingMore brushes
There are some great sources for brushes out there that have a license for personal use. As an example:
These brushes may not be bundled or shipped on their own or with the editor. You're free to use them on your own personal projects and some of them are a great addition to your toolkit when sculpting terrain.
About you
If you have interesting sources, approaches, opinions or ideas that aren't listed yet but may be valuable to the article: feel free to leave a message down below or contact me on Discord. The idea is to create a bunch of resources to share our knowledge surrounding development in Supreme Commander.
If you've used this resource for one of your maps feel free to make a post below: I'd love to know about it!
Disclaimer
The brush in the tutorial is at the moment quite poor and very fabricated. If you have a better brush that may have more use and is free of a license then feel free to poke me and I'll update the article with the new brush applied
") .
.