This is a part of a series on water within Supreme Commander. You can find other series at:
- <todo link>
This article dives into the idea of water ramps.
Parts
- Introduction
- Settings from a practical perspective
- Settings from a theoretical perspective
- Wave generation
- Brushes
- Ramp
- Environment maps
- Wave normal maps
- Pixelated water
Tools
Image editing tools, such as:
- Adobe Photoshop CS (https://www.adobe.com/products/photoshop.html)
- NVIDIA exporter (https://developer.nvidia.com/nvidia-texture-tools-exporter)
or - Gimp (https://www.gimp.org/)
Map editing tools, such as:
Ramps in general
A ramp is nothing more than a very thin gradient. Typically a ramp is a texture with a height of 1 and any with that is some power of 2. The reason for the latter is performance. A few examples of ramps, with a significantly larger height, are already available to you:
waterramp.dds 
waterramp_eg.dds 
waterramp_evergreen02.dds 
waterrampSwamp02.dds
A ramp heavily relies on transparency, hence these may look different depending on your theme of the forum. Typically a ramp looks like this in Photoshop where the block pattern indicates that the texture is transparent there.
For this article I assume that you have extracted all the textures the game has to offer. If you haven't done so and / or don't know how to please review the FAQ in the overview article. There is one explicitly on how to do this properly to allow the GPG editor and the game itself to find the textures.

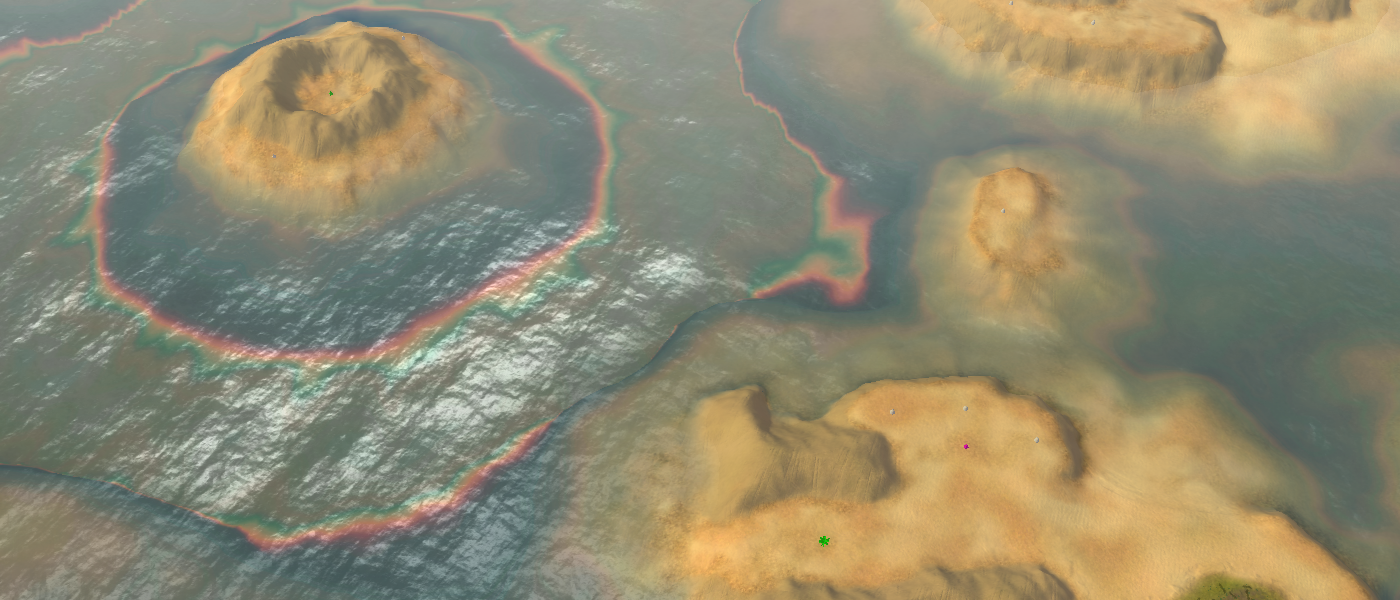
Water ramps are used in Supreme Commander to color the terrain at each pixel, depending on the depth of the pixel. The functions takes in the depth as an argument that is relative to the surface and abyss parameters. At the surface or higher we expect no coloring of the water, where as a in the abyss we expect the full coloring of the water. Think in terms of lemonade: the deeper you put something in the less visible it will become.
Water ramps available by default
The game provides a bunch of water ramps by default. These are used throughout the default skirmish and campaign maps. Assuming that you have extracted the textures properly previously, you can find them at:
%InstallationFolder%/textures/engine/
Inside you'll find a bunch of water ramps:
- waterramp.dds
- waterramp_desert.dds
- waterramp_desert02.dds
- waterramp_desert03.dds
- waterramp_desert03a.dds
- waterramp_eg.dds
- waterramp_evergreen02.dds
- waterramp_FS2.dds
- waterramp_lava.dds
- waterramp_redrock.dds
- waterramp_redrock01.dds
- waterramp_redrock02.dds
- waterramp_redrock03.dds
- waterramp_tropical.dds
- waterramp03_Eop5.dds
- waterrampSwamp01.dds
- waterrampSwamp02.dds
The best way to see them is either through the explorer in Windows 10 or by opening them up in Photoshop. On Windows 10 if you represent images as large pictograms it can, at times, interpret .dds files properly allowing you to see its color scheme.

Changing the water ramp
Using the Ozonex editor
At the moment of writing the Ozonex editor renders the water quite differently. In turn the rendering of the water that you see in the Ozonex editor is not representative to what you'd see in-game.
Using the GPG editor
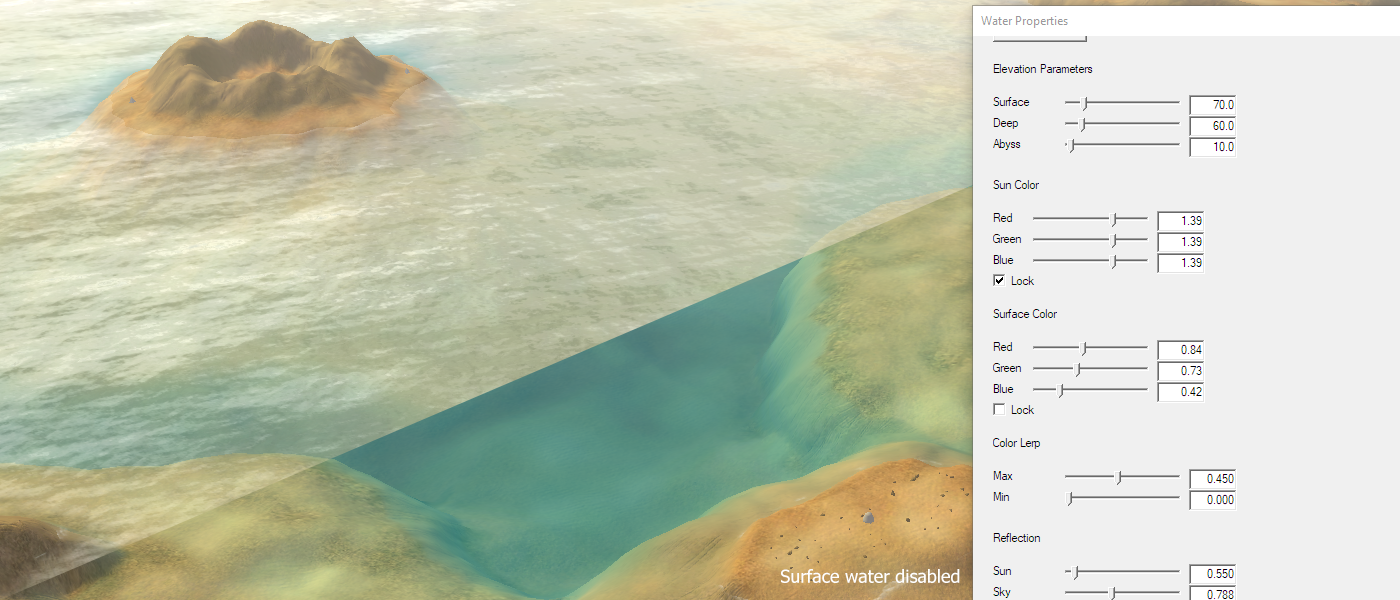
Select the Water layer and then click on 'Water Properties' in the toolbar of the editor. The tool window will respond and change into a 'Water Properties' window. For this article we're interested in the 'Texure Maps' and particularly in the 'Water Ramp' texture.

Showing the properties in which we're interested in for this article
At this point I assume that you have extracted all the textures the game has to offer, as described in the frequently asked questions (FAQ) section of the introduction. Click on the '(...)' button next to the water ramp texture and navigate towards:
%InstallationFolder%/textures/engine/
Choose any of the water ramps available and start experimenting with them.
Custom water ramps
You can store water ramps inside your map folder. For stratum textures, decal textures and props there is a specific location where these should be stored. For water there is no hierarchy that you need to use in order for the game to find the files. It is good practice to store them inside the 'env' folder that the other textures require in order to function.
As an example, you can store them in:
%MapName%/env/
For this tutorial we'll use the following water ramp:

Put the texture in the map folder and then select it accordingly with the GPG editor.
It makes you wonder why there hasn't been a custom rainbow water ramp before'
When you upload the map to the vault the name of the folder of your map is changed. The path to your custom water textures is not adjusted accordingly, in turn the game cannot find the corresponding textures.
To approach this you can use the Ozonex editor to bump your map version. This creates a new folder with the correct version, and you can use the GPG editor to set the corresponding paths. When uploading to the vault the name of the folder of the map matches its map version and therefore no longer needs adjusting. The path remains the same and everyone can load in the custom water textures.
Under the hood
With Supreme Commander we're in a unique position in which we can not only toy around with graphical assets, we can also see how these assets are used in the rendering pipeline of the game. The (HLSL) shaders can be found at:
%InstallationFolder%/gamedata/effects.scd
To strengthen our understanding of this article it is nice to see how the assets are used in the rendering pipeline. For this article, the following bit of code inside the terrain.fx file is particularly interesting.
// as defined in terrain.fx

// apply the water color
float3 ApplyWaterColor( float depth, float3  inColor)
{
#ifdef DIRECT3D10
    float4 wcolor = tex2D(WaterRampSampler, float2(depth,0));
#else
    float4 wcolor = tex1D(WaterRampSampler, depth);
#endif
    return lerp( inColor.xyz, wcolor.xyz, wcolor.w );
}
The shader code shows us that we are only interested in the first row of pixels, using the depth argument to determine what pixel we should use. The depth value is clamped between 0.0 (surface or higher) and 1.0 (abyss or lower). We use the alpha channel wcolor.w to interpolate between the input and the color retrieved from the ramp. The input is in this case a color too: the color of a fully shaded bit of terrain.
The code shown is part of the shader that renders the terrain - the water itself isn't changed. The water is influenced indirectly by the water ramp through refraction, causing the water itself to change color.
For more information on the operators used:
- https://developer.download.nvidia.com/cg/tex1D.html
- https://developer.download.nvidia.com/cg/tex2D.html
- https://developer.download.nvidia.com/cg/lerp.html
Frequently asked questions (FAQ)
All of the terrain turned black and red
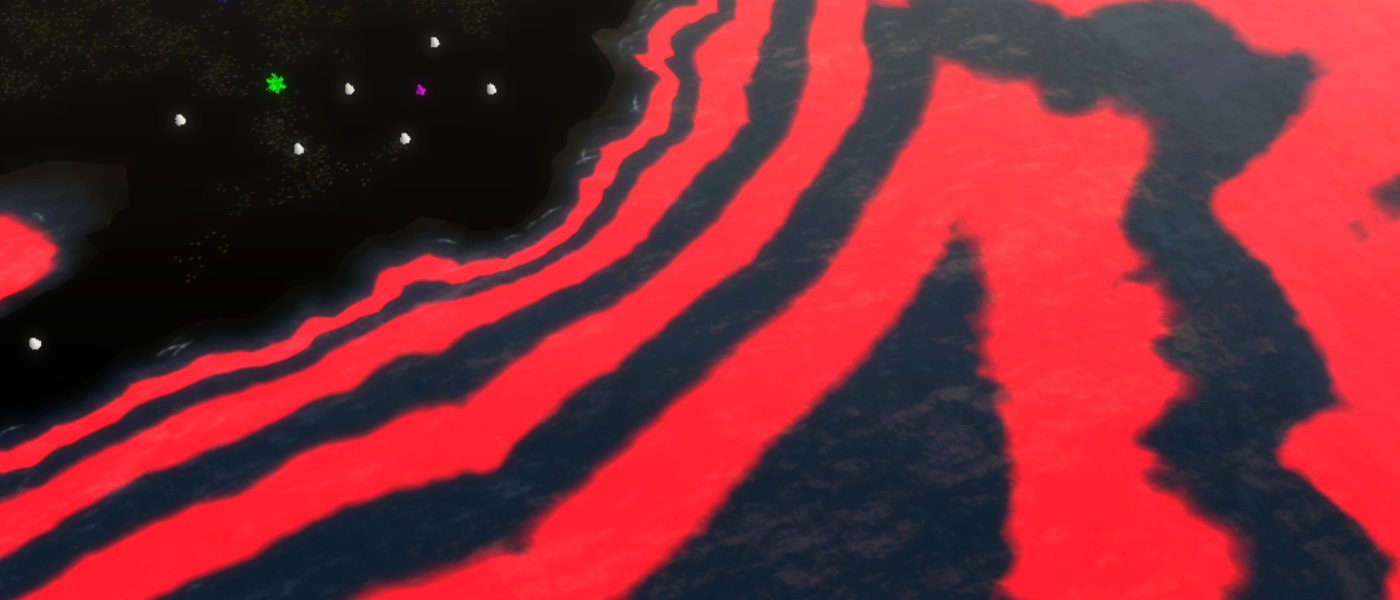
Terrain with black and red stripes on it
The editor or the game cannot find your water ramp and therefore uses the default texture to make sure at least some texture could be loaded and shown. This default texture has no transparency and therefore the terrain, even the bits and pieces above water, completely disappear in the interpolation.
One cause is that the textures that you unpacked are at the wrong location. Make sure that the paths are:
Good: /textures/engine/waterramp.dds
Bad: /gamedata/textures/engine/waterramp.dds
Another cause when you use custom textures is that the map version got bumped but you didn't update the path accordingly. As an example, when uploading to the vault the folder name is adjusted if it doesn't match the map version accordingly.
About you
If you have interesting sources, approaches, opinions or ideas that aren't listed yet but may be valuable to the article: feel free to leave a message down below or contact me on Discord. The idea is to create a bunch of resources to share our knowledge surrounding development in Supreme Commander.
If you've used this resource for one of your maps feel free to make a post below: I love to know about it!